Editor Overview
Here is a screenshot of a basic HTML document open in a document tab in Nova:
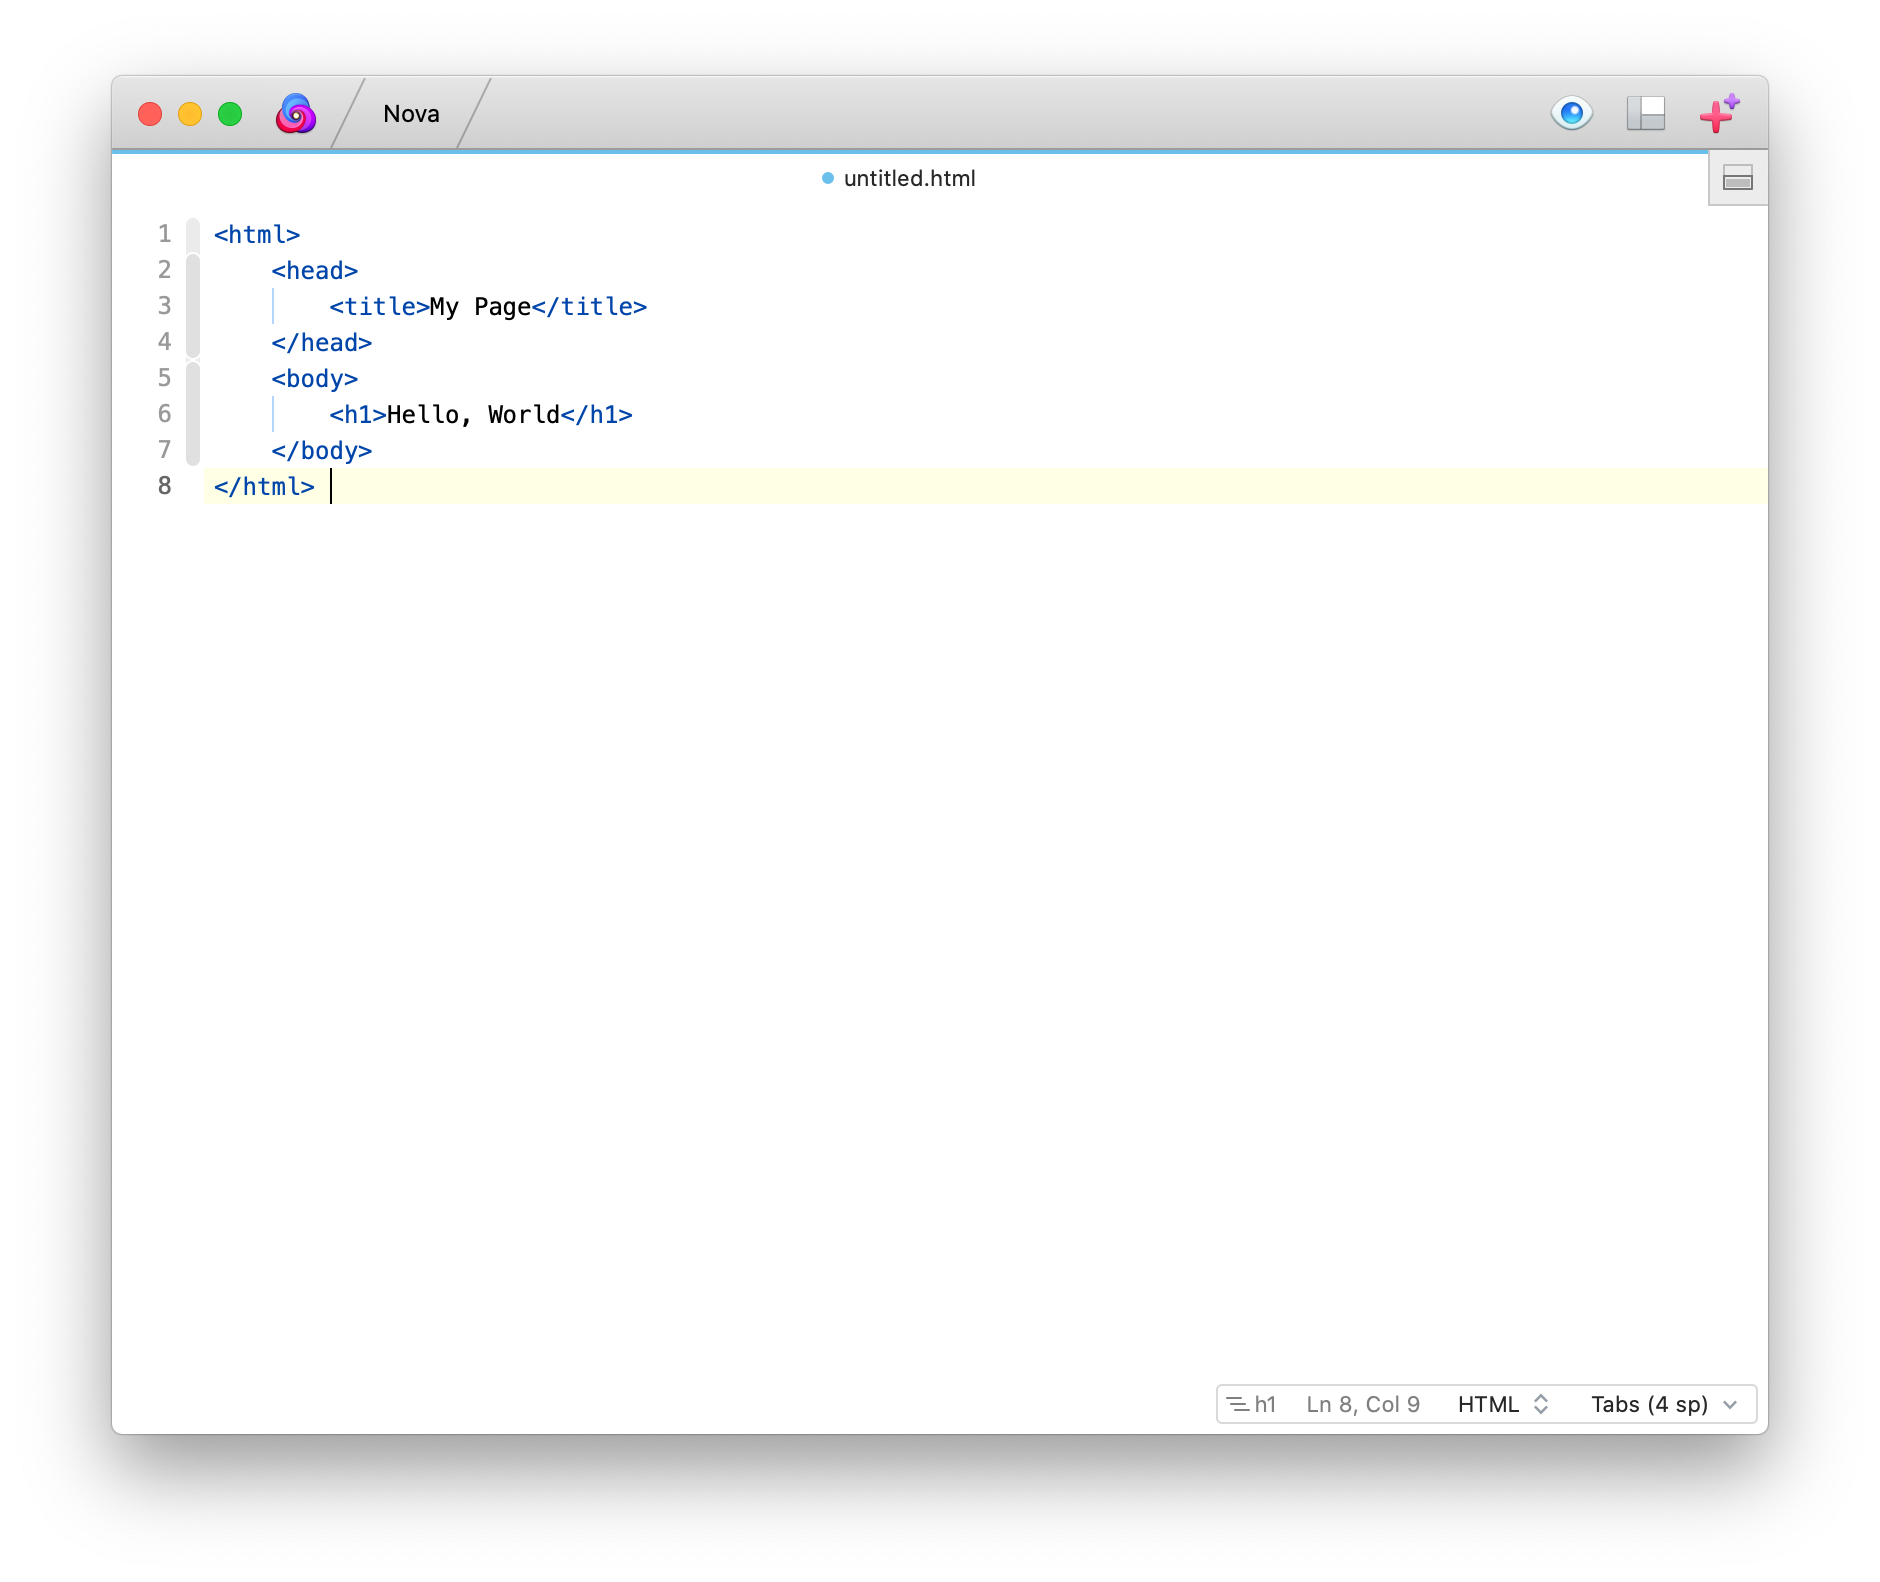
You can see the main text editing area with the code folding ribbon to its left. The shading of the ribbon gives you a visual hint about the indentation level or “depth” of the code at that line. To the right of the line numbers is the line number gutter.
In the bottom right corner of the view you’ll see the status view which displays information about the current document.
- Symbols Navigator
- The current Symbol based on cursor placement.
- Line & Column
- The line and column numbers of the cursor’s location.
- Syntax
- The syntax mode being applied to the current document.
- Indentation
- The indentation style being used by the current document.
Click any section of the status view to perform additional actions!
In the editor itself, a colored highlight identifies the line the cursor is currently on.
Language syntax highlighting is performed by default, but may be disabled in Nova’s preferences. In fact, many of Nova’s editing behaviors are customizable there, including autocompletion, tab key behavior, and indentation, among others.
Text Manipulation
Beyond just typing characters into the editor, you’ll want to learn how to manipulate entire blocks of text at a time. Most text actions are dependent on either the position of the cursor in the document, or the range of currently selected text.
Moving The Cursor
For short movements, use the arrow keys to move around.
- ⌘↑ and ⌘↓ will move immediately to the top or bottom of the document, respectively.
- ⌘← and ⌘→ will move immediately to the beginning or end of the current line, respectively.
- Function-↑ and Function-↓ (or PgUp and PgDn) will page up and down through the document without moving the cursor.
- option-← and option-→ will move back and forward one “word” at a time.
Selecting Text and Basic Operations
Click and drag your mouse across a range of text to select it. To extend your selection with the keyboard, hold down the shift key while pressing one of the arrow keys.
To quickly select one or more lines of text, click and drag in the line number gutter.
Selected text can be cut, copied, and pasted, as with any other text editor.
Refer to the Editor menu for other basic text selection options, including:
- Select Word/Line
- Select Above/Below
- Select In Scope/Type/Function
- Select Previous/Next Instance of Word
Autocompletion
Nova supports a variety of autocompletion features for many common programming languages, including HTML, JavaScript, CSS, PHP, and more.
In this screenshot, Nova is offering potential completions for the text <st that was just typed into this HTML document:
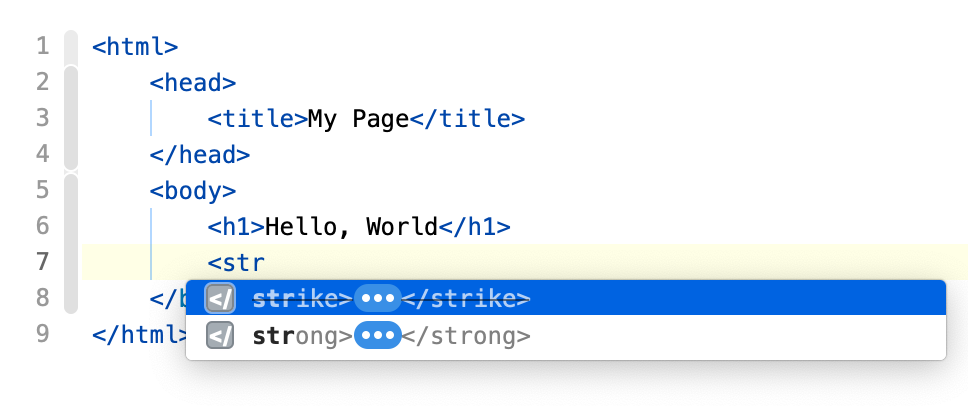
If Nova’s first guess (highlighted) is correct, simply press return. Nova inserts the opening and closing strike tags, and automatically positions the cursor between them.
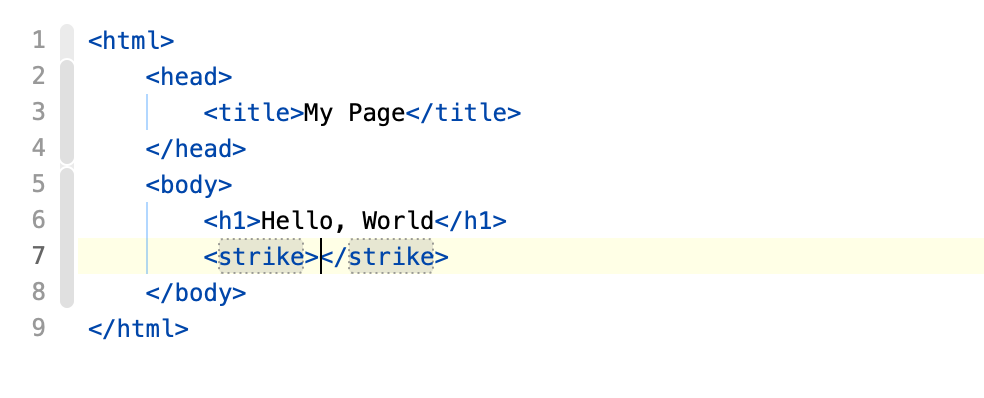
The up and down arrow keys move through the list of autocompletion candidates, and return selects the highlighted one. Pressing the esc key will dismiss the autocompletion window.
Generally, it’s safe to just keep typing if you don’t want any of the completions. Nova won’t automatically complete anything unless you tell it to.
You can disable autocompletion from the Editor tab of Nova’s preferences.
Autocompletion also works for user-defined symbols in supported languages such as JavaScript, PHP, and CSS.
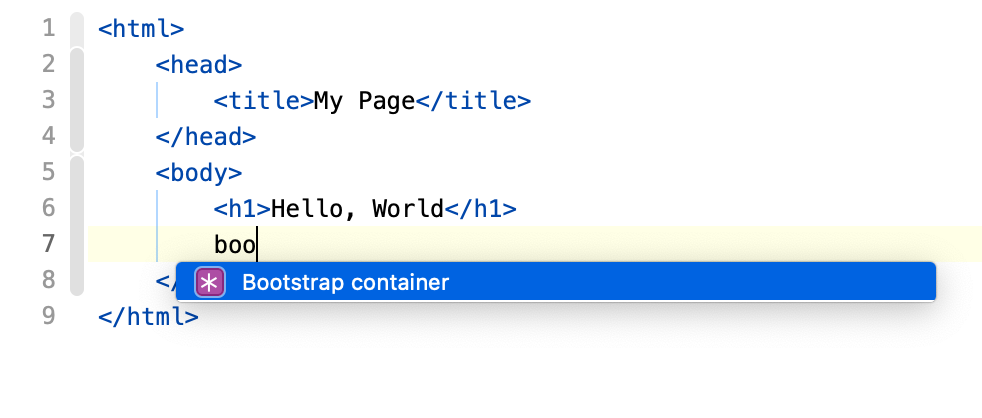
If you type the partial name of a clip trigger, Nova will offer to insert the contents of the clip. A unique icon will be shown next to these completions. Refer to the Clips sidebar article for more information on clips.
Autoclosing
Nova will also try to help by automatically “closing” HTML tags and bracket pairs. In HTML, you can simply type </ (less than, slash) to close the innermost open tag.
For example, if you have: <strike>
And type </ you will have: <strike></strike>
When you type an opening bracket character (including curly braces, square brackets, or an open parenthesis), the corresponding “closing” bracket will automatically be inserted after the cursor. This allows you to type the content between the brackets.
If you have more text to type after the closing bracket, you can step over it with the right arrow key, or “overtype” it with the same closing bracket character; Nova will not add a duplicate closing bracket if you are overtyping an existing one.
If the cursor is between a pair of matched brackets with nothing else between them, backspacing over the opening bracket will also delete the closing bracket.
These autoclosing features can be disabled from the Editor tab of Nova’s preferences.
Indentation and Tabs
By default, Nova indents new lines to match the indentation level of the immediately previous line. It uses tab characters (instead of spaces) with a tab width of 4 spaces. It soft-wraps text that extends past the right-edge of the editor. All of these defaults can be changed in the Editor tab of Nova’s preferences.
You can adjust the indentation level of selected text by pressing tab (to indent) or shift-tab (to “outdent”). The keyboard shortcuts ⌘] (Shift Right) and ⌘[ (Shift Left) can also be used, and will operate on the current line if there is no selection. Pressing tab without a selection inserts a literal tab character.
There are additional options that affect indentation behavior in the Editor tab of Nova’s preferences. Refer to the “Settings” article for more information.
Multi-cursor Editing
Multi-cursor editing allows you to insert the same text at multiple locations in the same document.
To place an additional cursor, hold down the option key on your keyboard and click at the desired location.
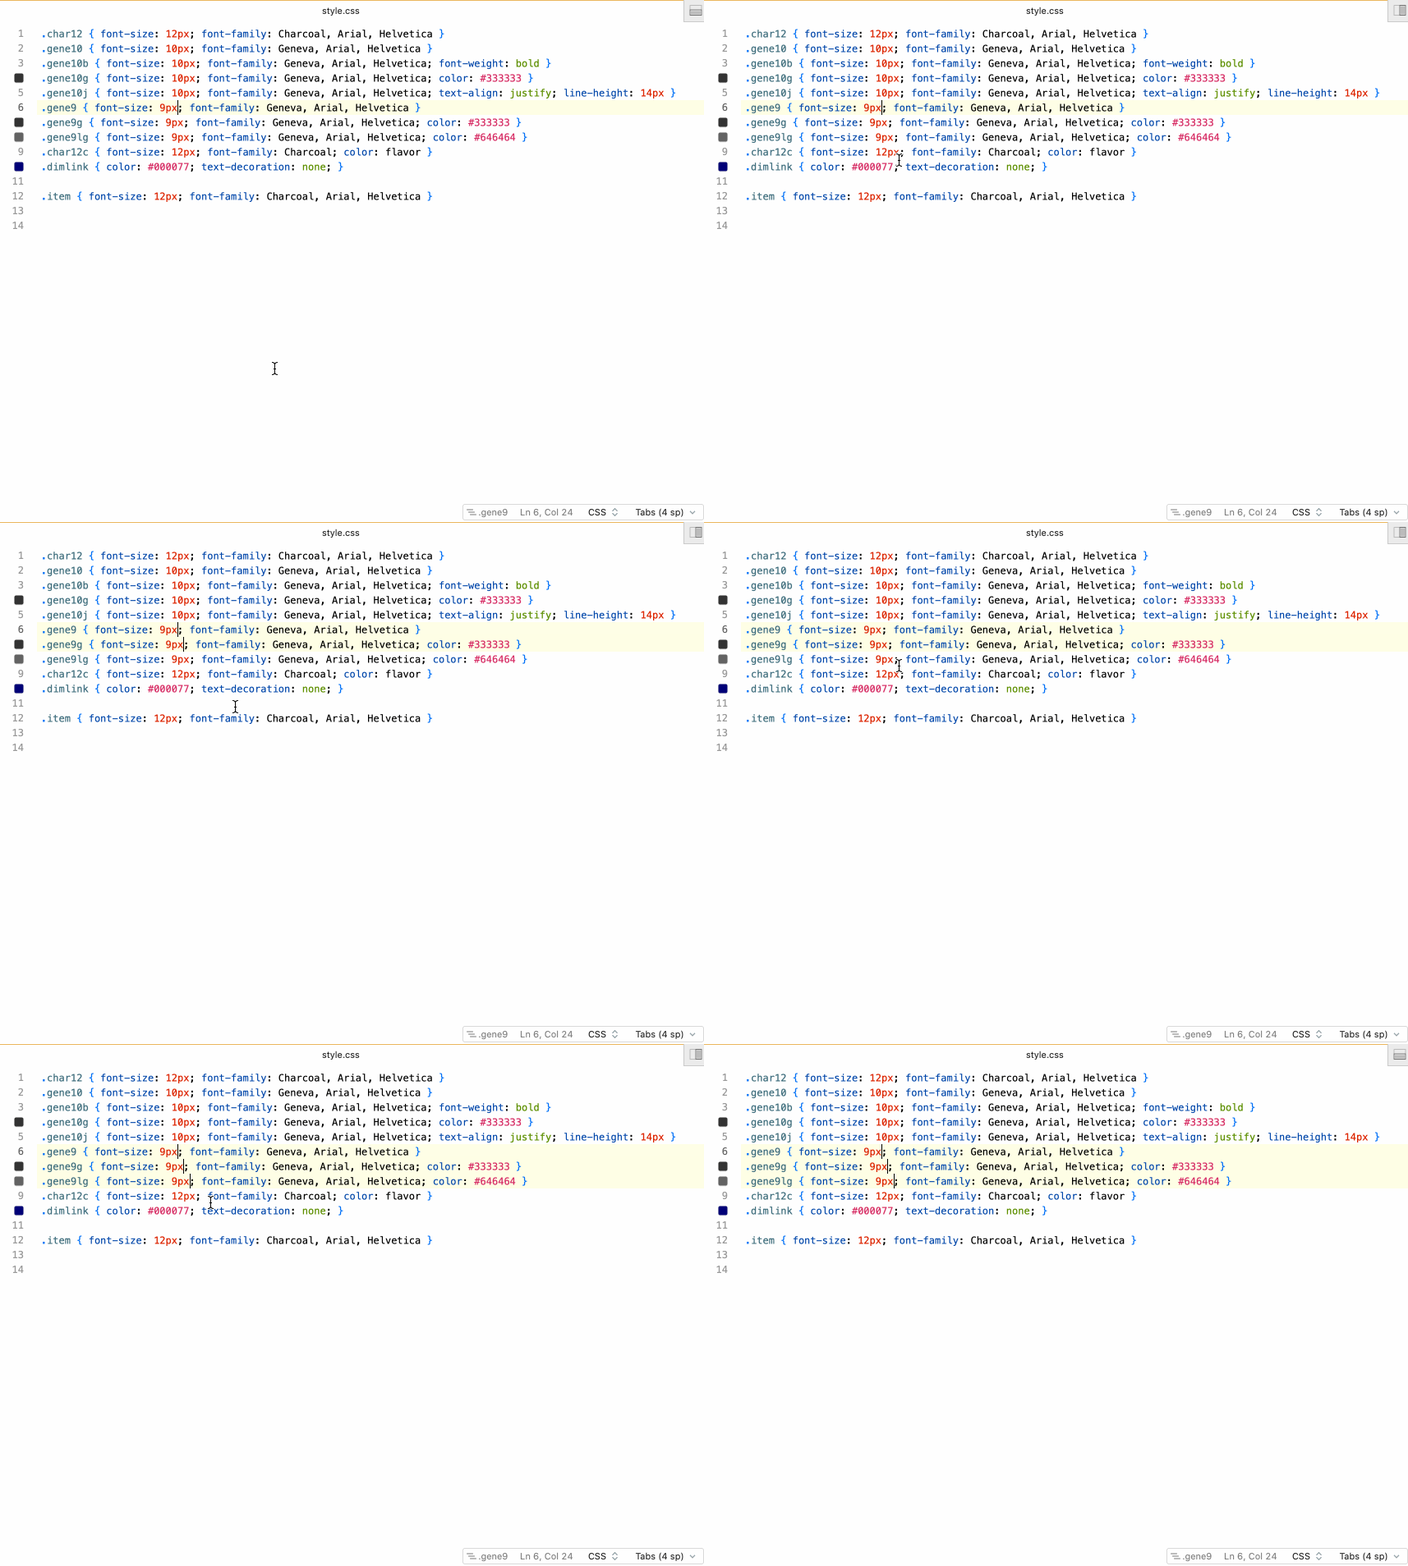
Alternately, hold the option key then click and drag vertically to add a column of cursors in the editor.
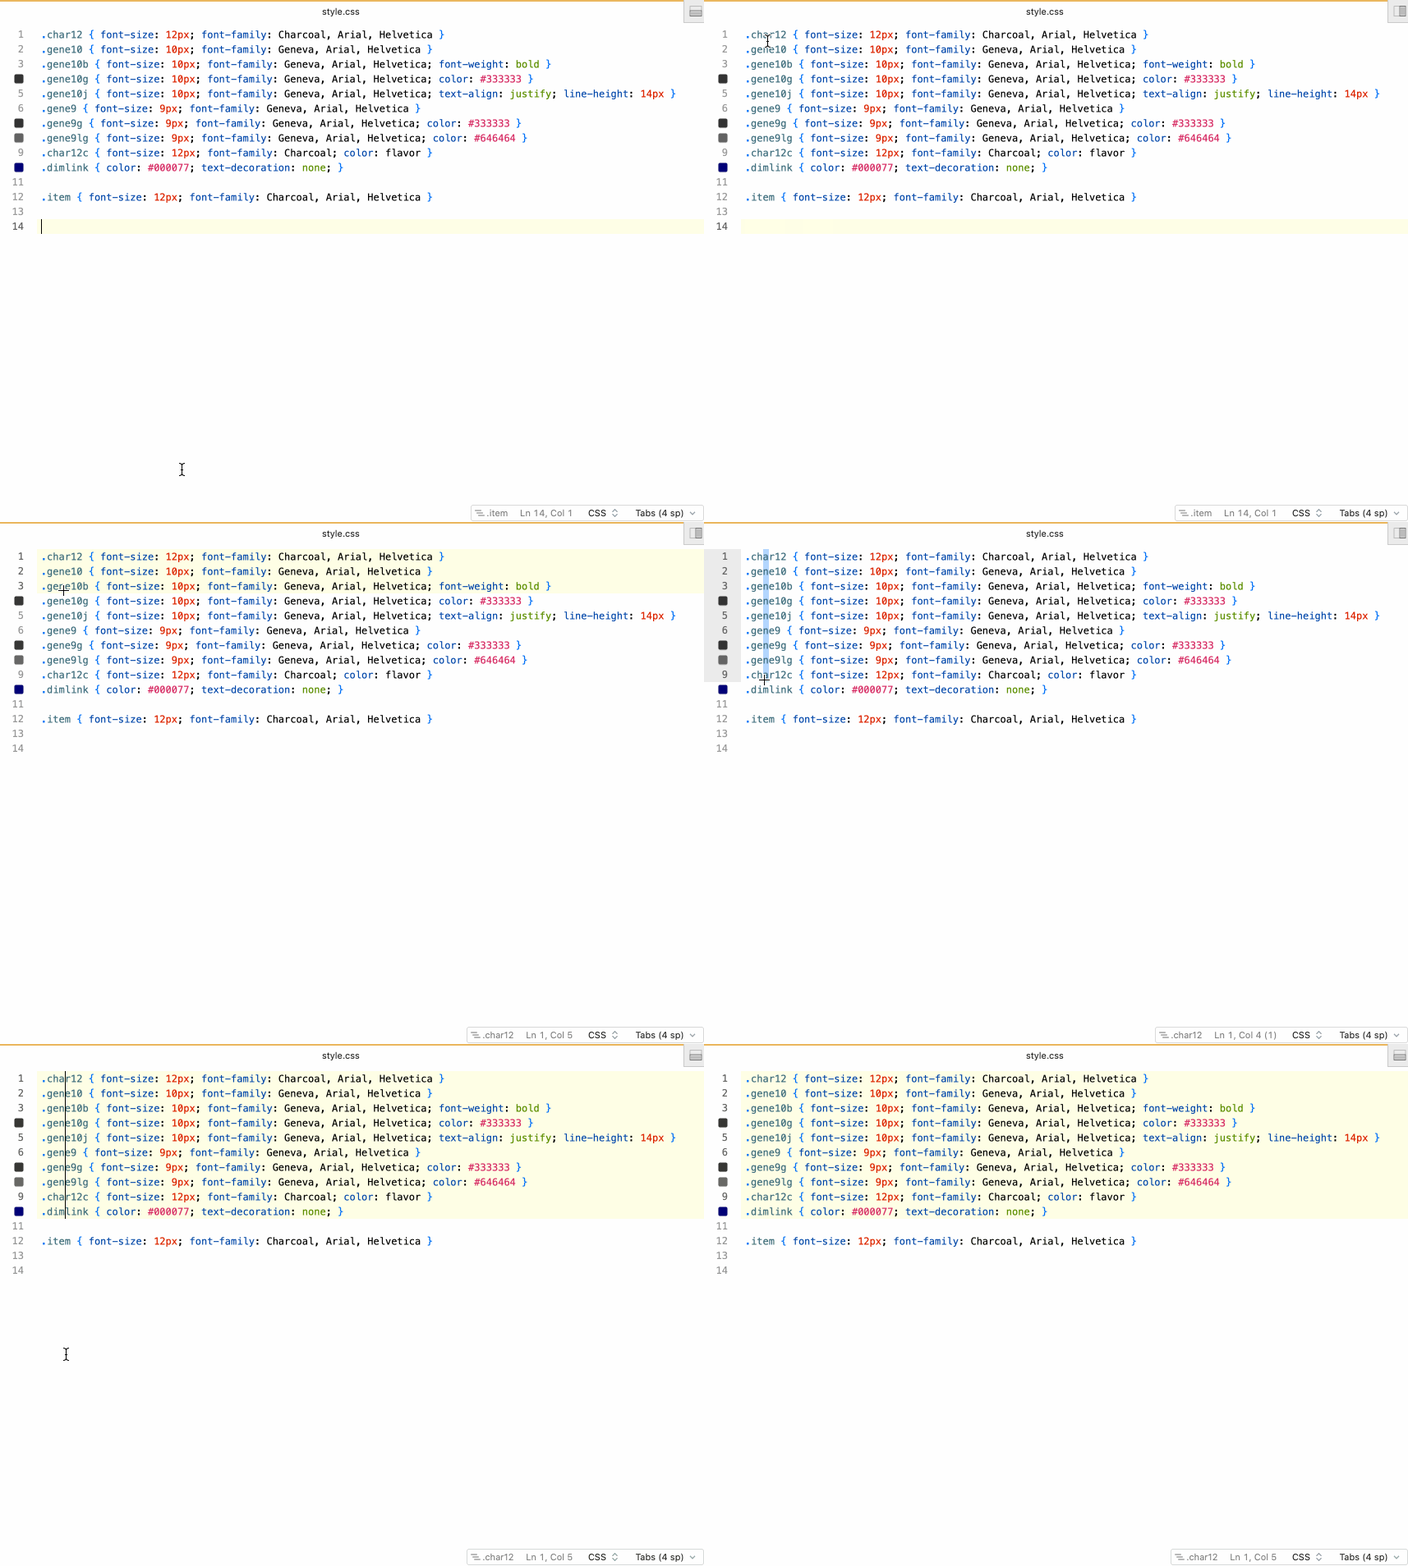
With multiple cursors in place, any text you type will be inserted at each cursor in the document.
After adding a column of cursors, drag horizontally to blockedit a text selection. Blockediting is useful for editing columnar text or inserting the same text on multiple lines (typically at the beginning of each line).
To add an additional block, hold Option-Shift-Drag and then select another range of text within the document.
To end multi-cursor mode, click outside the shaded area, or simply press esc.
Wrapping Text in a Tag Pair
Often in HTML, you may find you type a block of text then realize it needs to be wrapped in a particular tag pair. To do this quickly, first select the text to be wrapped, like so:

Then choose Editor > Wrap Selection in Tag:

The text is automatically wrapped with placeholders. Now simply type the desired tag. Nova will even automatically update the closing tag for you.
Built-In Text Processing Actions
The Editor menu also supports actions to Convert Spaces to Tabs and Convert Tabs to Spaces.
Sometimes files end up with a mixture of spaces and tabs used to indent lines, which can be problematic. These two options convert spaces to tabs (or vice-versa) by applying your current Tab Width preference.
For example, with the default Tab Width of 4, Convert Spaces to Tabs will convert any run of 4 spaces into a single tab character. Convert Tabs to Spaces will convert every tab character into 4 spaces.
Changing the Editor Font Size
To quickly make the editor font a little bit bigger or smaller, choose View > Increase Font Size (⌘+) or View > Decrease Font Size (⌘-).
The default editor font and size can be adjusted from Settings > Editor > Display.
Jumping to a Specific Line Number
If you know the line number you need to go to, choose Go > Go to Line… (⌃G) then enter the line number in the pop-up that appears.

You can also access this pop-up by clicking the line/column section of the status view in the bottom right corner of the editor window.
Line Endings
Nova supports the following line endings:
- macOS / Unix (LF)
- Mac OS Classic (CR)
- Windows (CRLF)
If Nova detects inconsistent line ending usage when opening a document (for example, some lines appear to terminate with Unix-style endings and others with Windows-style) it will ask you if you wish to convert all line endings in the document to the most prevalent.
Nova defaults to macOS / Unix (LF) line endings, but you can change the default in the Editor tab of Nova’s preferences.
Text Encodings
By default, Nova creates all new text documents in UTF-8 encoding. When you open existing text documents, Nova will inspect them to try to automatically determine the correct text encoding to use.
You can change the text encoding of the current document by choosing an item from the Editor > Text Encoding menu. Nova will ask if you wish to Reinterpret or Convert the document.
Clicking Reinterpret will leave the file unmodified, but re-display it using the new encoding.
Clicking Convert will modify the document to make it conform to the new text encoding. If there are characters in the document that cannot be represented in the new text encoding (for example, if you try to convert a document with Japanese katakana characters to Western ASCII), Nova will display an additional warning that the conversion will be lossy. Lossy conversion may cause loss of diacritic symbols, replacement of characters with question marks, and similar side effects.
You can change the default encoding for new documents in the Editor tab of Nova’s preferences.