Publishing is an optional workflow you can use to deploy your website’s files from your project’s local folder to your web server using traditional file transfer protocols.
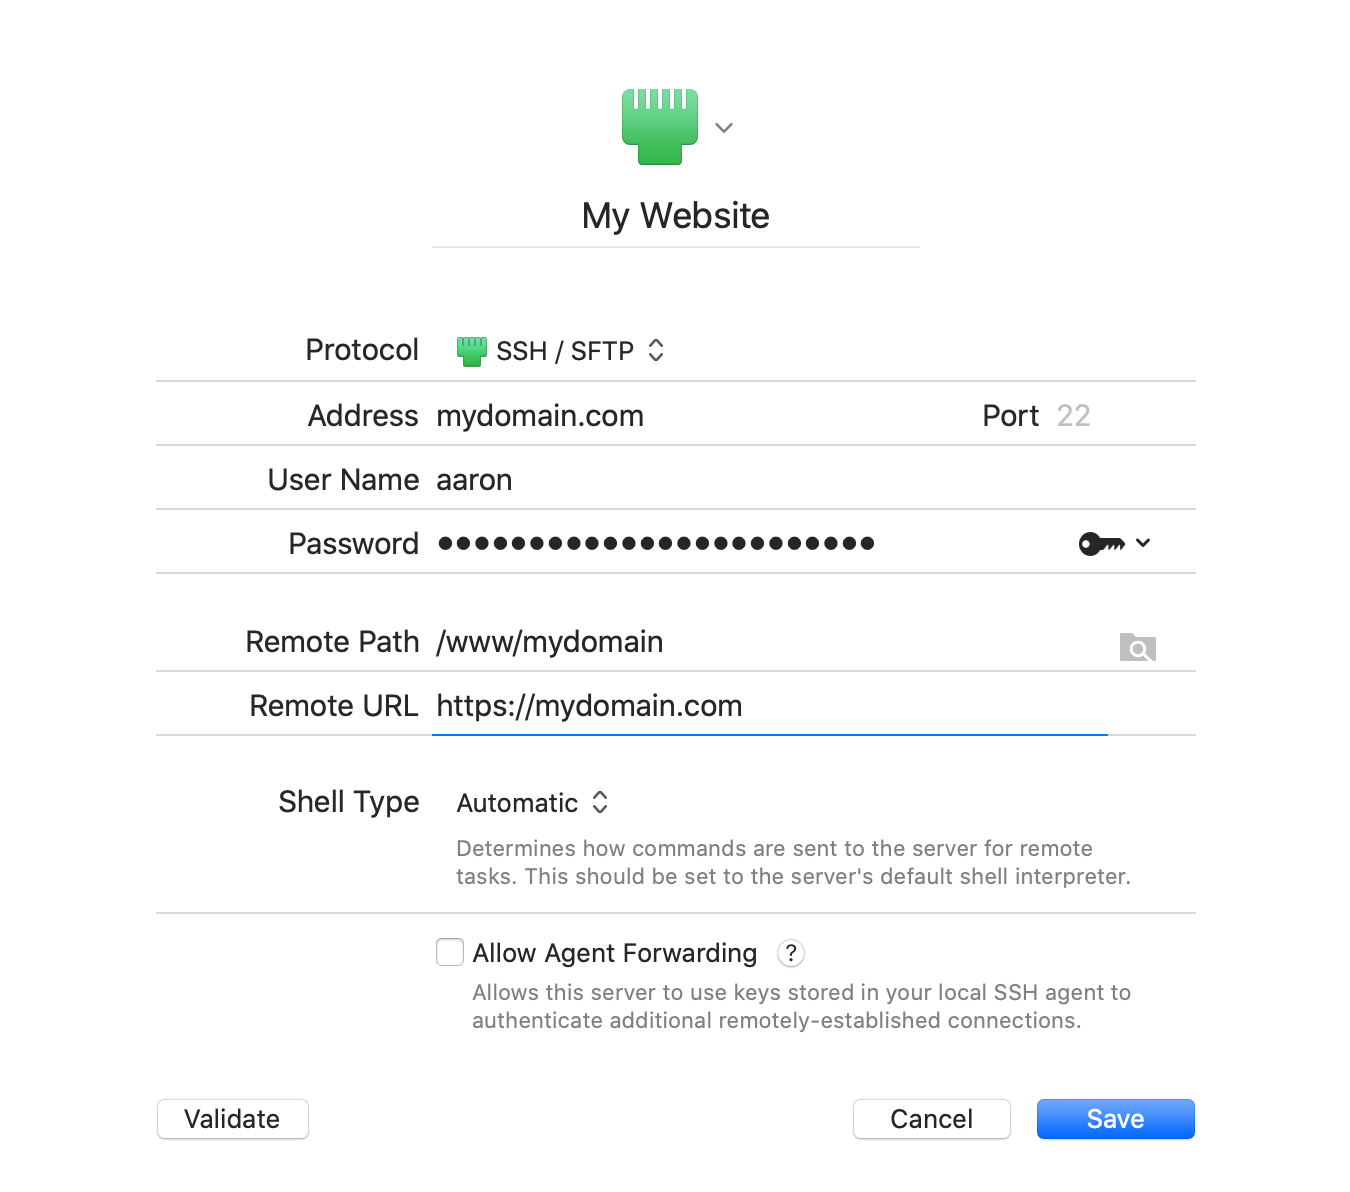
To use publishing, you must first configure a Server that contains at least the local and remote root paths of the website. Refer to the Servers article for more information.

Publishing assumes you have two copies of your website: a local copy on your Mac and a remote copy on your web server. It also assumes that the folder structure of both copies is identical at any given point below their root paths.
For example, consider these two file paths:
- Local
/Users/aaron/Documents/website/about/contact.html- Remote
/www/mydomain/about/contact.html
If your Server was configured as so:
- Local Workspace
/Users/aaron/Documents/website- Remote Root
/www/mydomain
…Nova would understand and assume that about/contact.html refers to the same file relative to the root of both copies of the site. The general idea behind publishing is you make changes on your local copy and test them there before putting them into production on the server.
Whenever you make a change to a local file in a Server that is configured for publishing, that file is added to the publishing queue. Over time as you work, you’ll accumulate a list of changed files. Then, with a single click on the Publish button, all of the changed local files are uploaded to the web server, and the publishing queue is cleared.
Adding Remote Servers to a Local Workspace
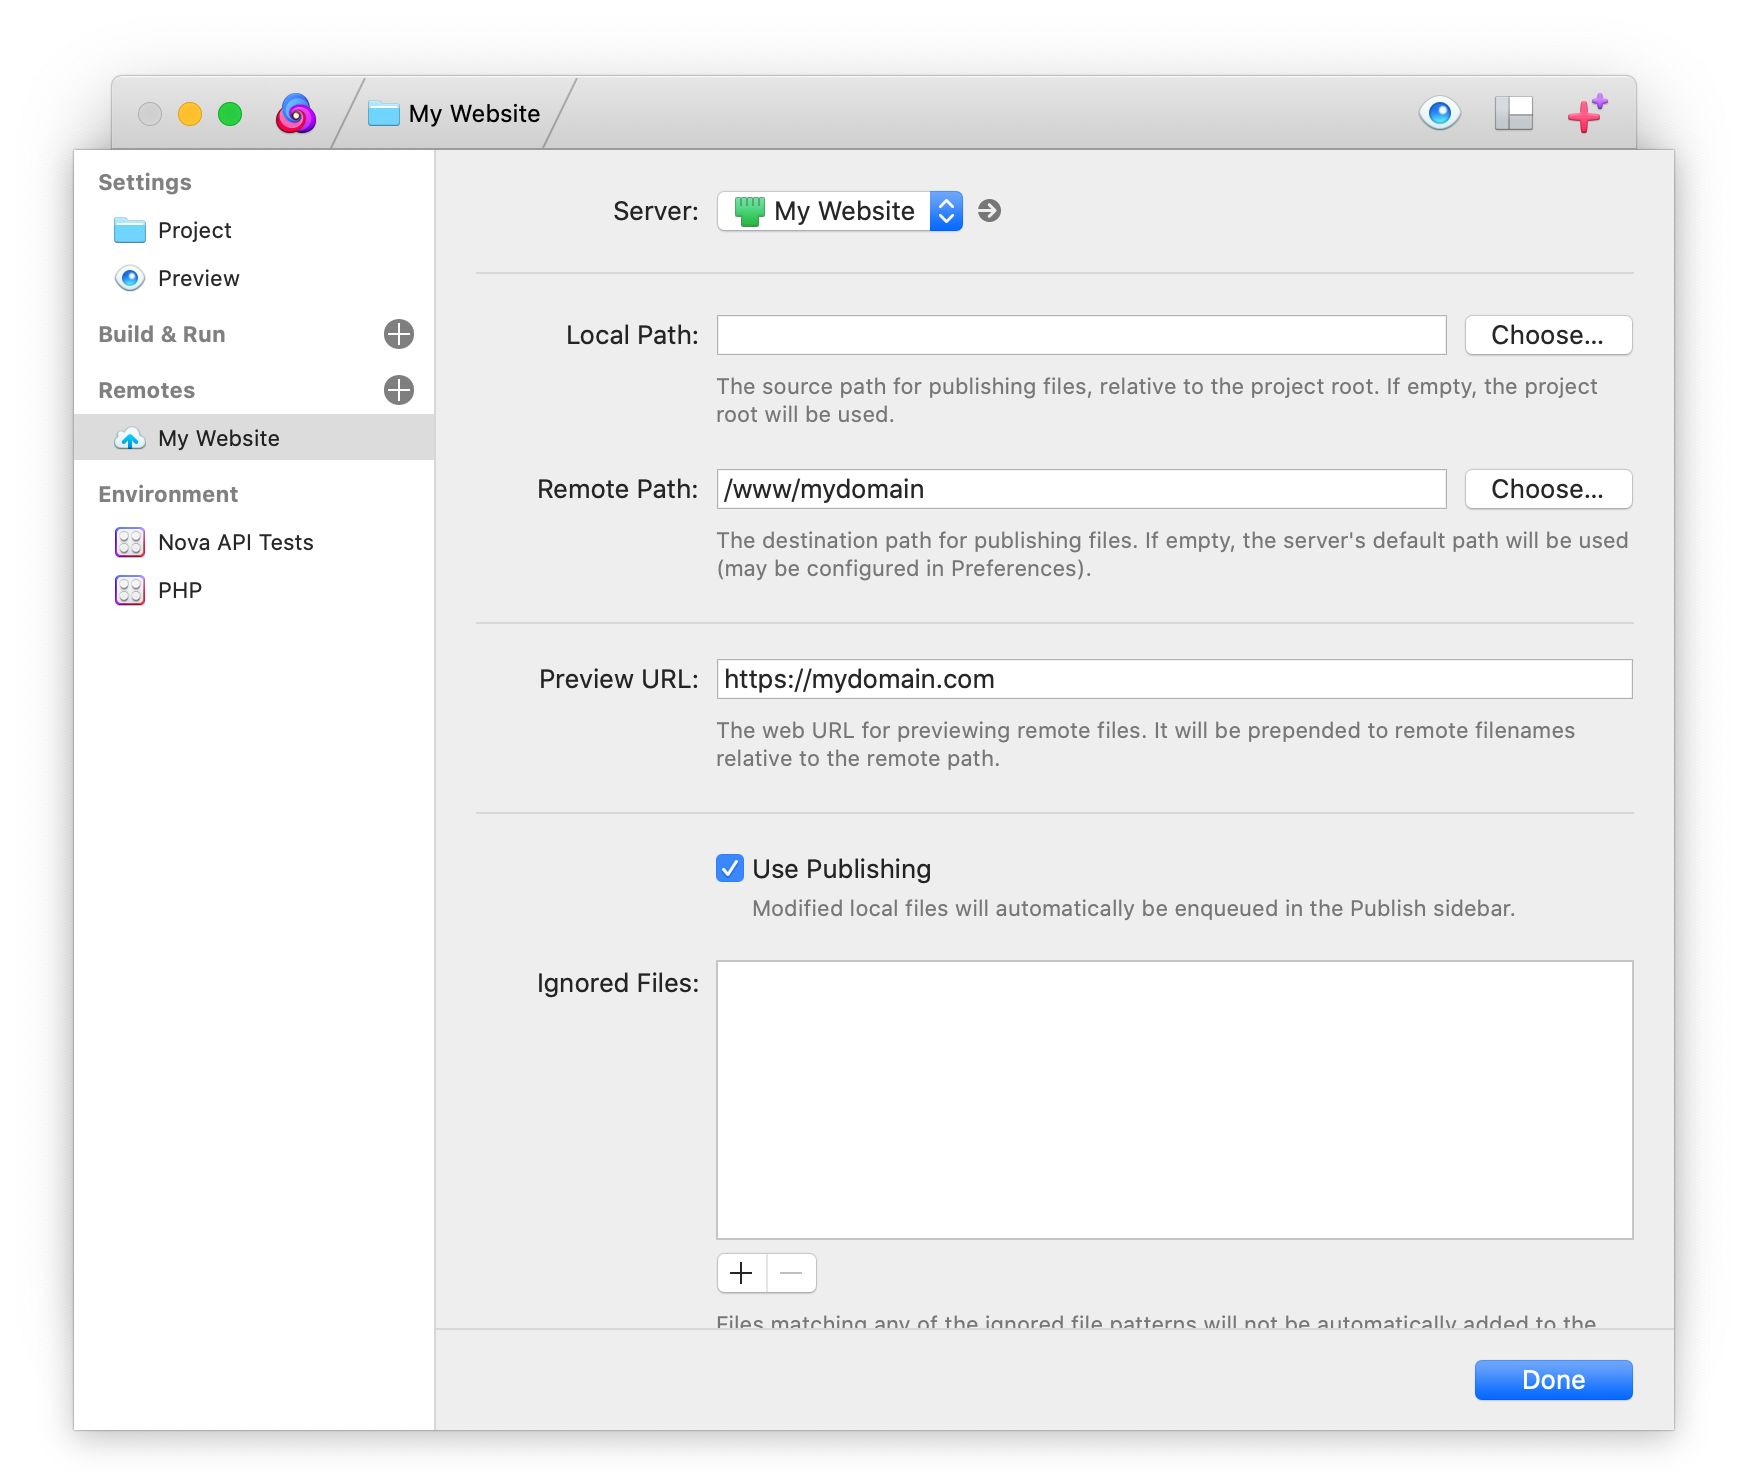
Once you’ve created and configured your Servers, you can add them as publishing destinations from Project > Project Settings. Once open, click the plus button next to Remotes in the sidebar, then choose which Server(s) you’d like to add as publishing destination from the dropdown menu.

After the Server has been added to the Workspace, make sure the Local Path and Remote Path are set correctly, then check the option for Use Publishing.
Publishing Changed Files
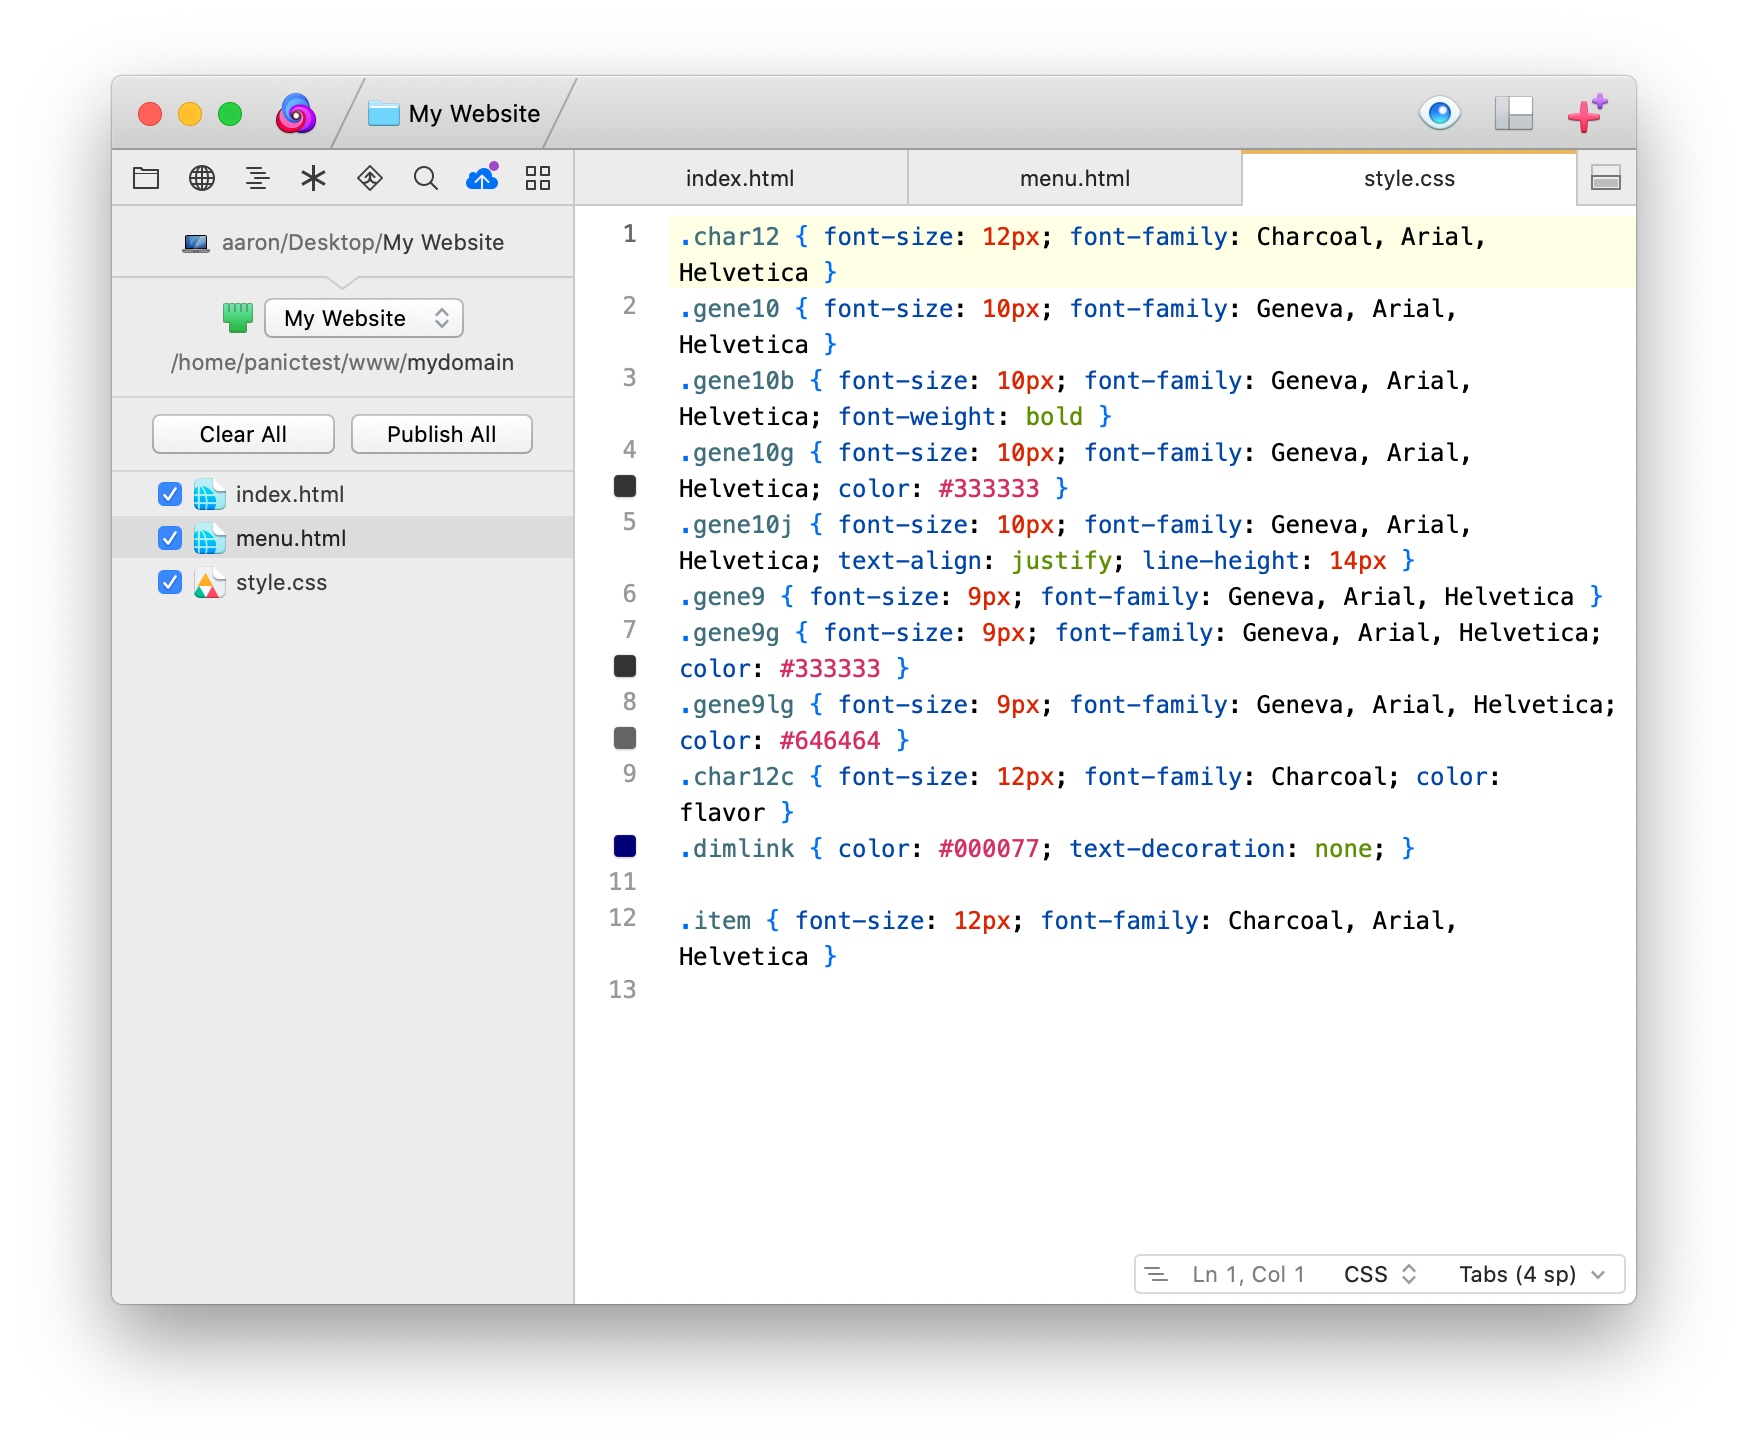
The Publish sidebar shows the list of changed files currently queued for publishing. The Publish sidebar’s icon will be badged with the number of queued files, if any. Queued files can be published individually, or all at once.

To publish a file individually, select it, then choose File > Publish > Document “name” to “destination” ⌥⌘P (“name” represents the name of the file to upload, and destination is the path it will be uploaded to).
Publish all changed files at once by choosing File > Publish Publish All Changes to “Server” ^⌘P, or click Publish All. All locally changed documents shown in the queue will be uploaded to the web server.
Nova will only publish files with a check mark next to them. You can uncheck files to prevent them from being published until you’re ready.
Clearing Queued Files
If a file has become queued for publishing, but you do not want it to be uploaded during the next publish operation, select it, and press the delete key. To remove all files from the queue, click Clear All.