Switching between the file browser and connection panel
To switch between a file browser and a connection panel, click the disk icon in the upper right of the file browser.
To switch back, click the globe icon in the same location.
By default, Transmit shows two file browsers side-by-side. You can make either browser display local or remote files by switching between these two modes.
Connecting with the Quick Connect tab
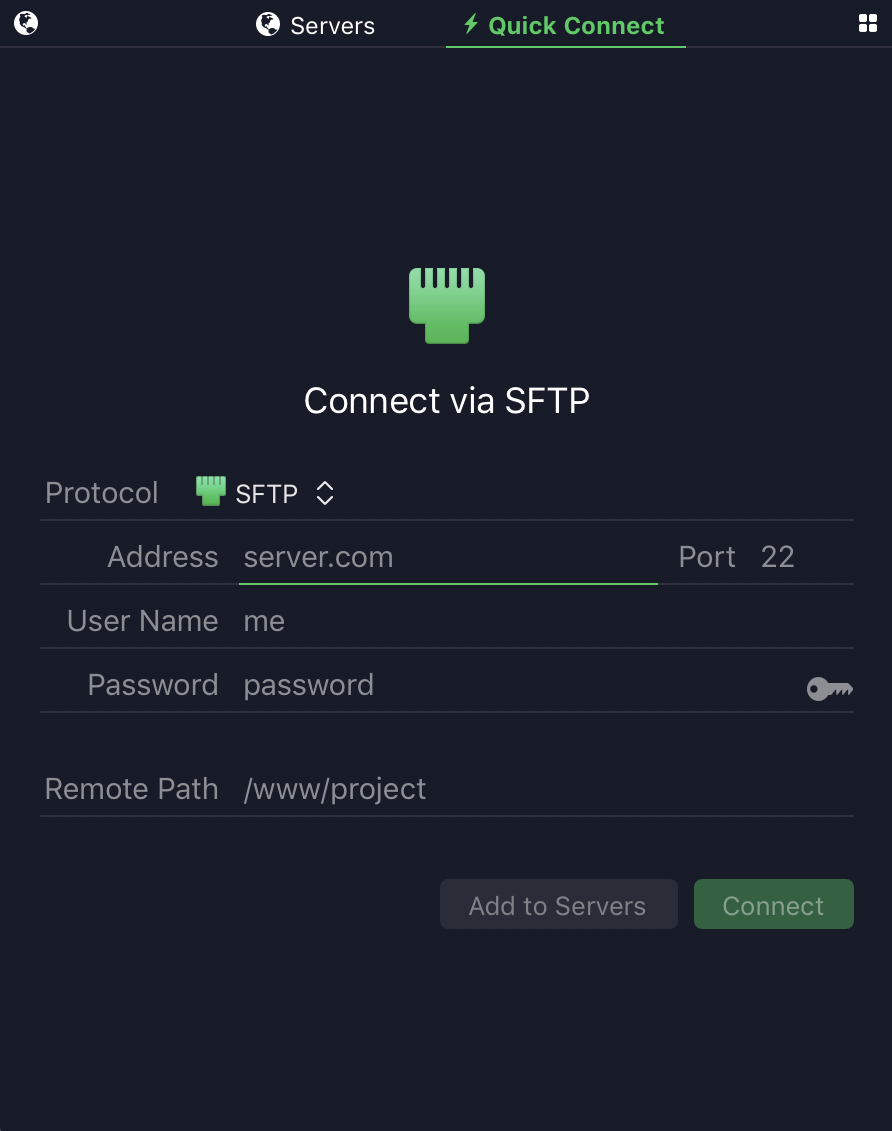
To manually start a connection using the Quick Connect tab:

Choose the server type that will be used to connect from the Protocol dropdown menu.
Fill out the form with the information required to connect to your server. If you don’t know this information, ask the person who administrates the server you want to connect to.
Click Connect to connect to the server within Transmit.
Disconnecting from the current server
To disconnect from the server you’re currently connected to, click the eject icon in the upper left of the connected file browser.
The eject icon is only visible when you are connected to a server.
Adding a new Server
To add a particular server configuration as a Server, choose Servers > Add New Server…
If you are already connected to a server, Transmit will infer the connection details from the current connection.
Otherwise, fill out the form that appears with the information required to connect to your server. If you don’t know this information, ask the person who administrates the server you want to connect to.
The Save as Droplet button will instead create a small application at a location of your choosing that will automatically upload any items dropped on it to the server location configured in the Server.
If you are at the Quick Connect tab and would like to add a Server using the information you’ve already entered, click the Add to Servers button or choose Servers > Add…
Connecting to Servers
To connect to a Server within Transmit, double click on the Server Name.
Organizing Servers
Transmit Servers can be organized into folders.
Two additional Server groups automatically maintained by Transmit can be found at the bottom of the Server list: Shared, and History.
The Shared folder shows you any servers that have been automatically discovered on your local network. The History folder keeps track of servers you have previously connected to.
You can also create your own folders to organize Servers as you like.
To create a new Server choose Servers > Add Folder, type a name for the folder, and press Return.
Servers and Server folders that you have created can be rearranged by dragging them with the mouse.
To sort Servers automatically click the view options button in the upper right of the server list, or access the contextual menu by holding down the control key while clicking anywhere in the Servers panel.
Editing Servers
To edit a Server, select it, then choose Servers > Edit “Server-Name”, or right click the server in your list and cick “Edit”.
Deleting Servers
To delete a Server or Server folder, select it, then press the Delete key.
Importing and exporting Servers
To create a file containing information about all your Transmit Servers, choose Servers > Export…
To import Servers or Favorites exported from another copy of Transmit (or certain other file transfer applications), choose Servers > Import
Unregistered trial versions of Transmit cannot import Servers. Please purchase Transmit to enable this command.
Syncing Servers between devices
Transmit 5 can sync your Servers, Keys, and connection information between devices using a Panic Sync account.
You can create a new account (or log into an existing account) in Settings > Sync.
Similar to importing and exporting servers, unregistered trial versions of Transmit do not support Panic Sync.
More information about Panic Sync can be found on our website.
Creating Droplets
A droplet is a small application icon onto which you can drop files and folders. The droplet then opens Transmit and automatically uploads the dropped items to the location configured in the droplet.
Droplets are a convenient way for non-technical users to upload files to a pre-set location.
To create a droplet, you must first create a Server that describes the server and path you wish to send files to.
To create a droplet for a specific Server:
- Edit the Server.
- Click Save as Droplet… (you may need to scroll down to see this button)
- Type in a name for the droplet
- Choose a folder to save the droplet to
- Choose Save password in droplet for convenience, or Prompt for password for higher security
- Click Save
As mentioned in Droplet troubleshooting, the first time you launch a new Droplet you will need to right click the icon in Finder and choose Open from the contextual menu.