Transmits Settings
General
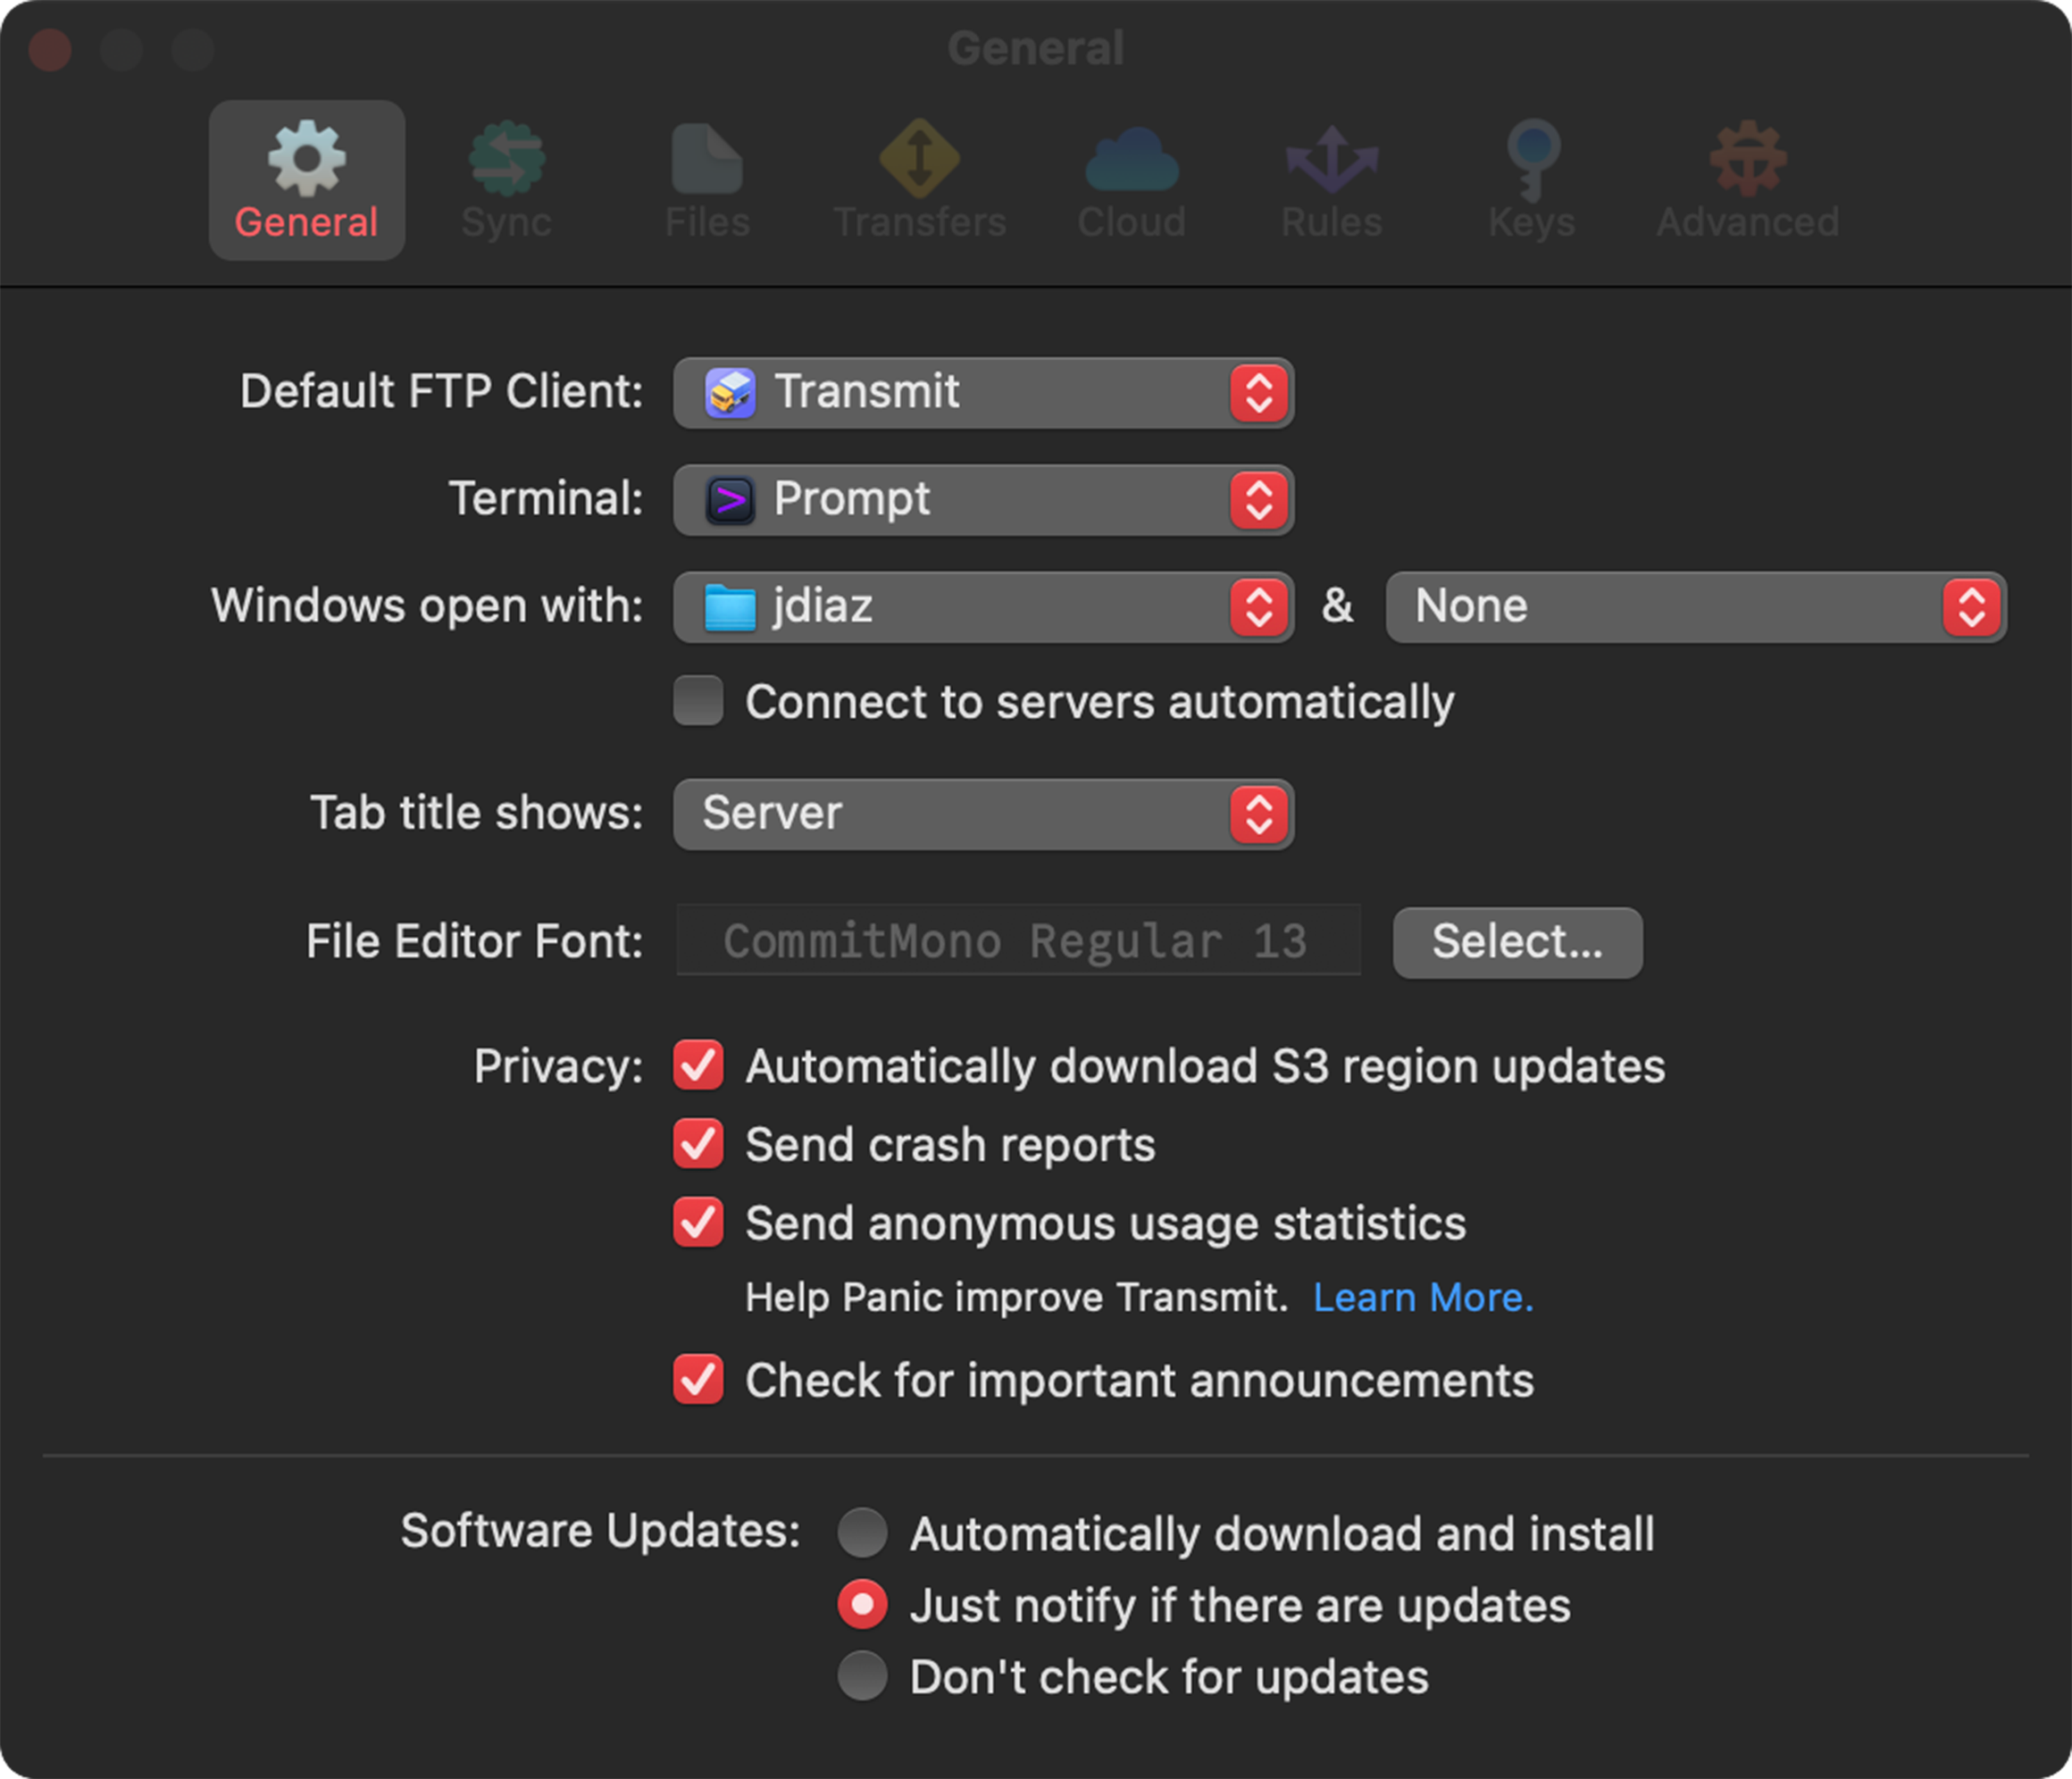
Default FTP Client
|
Tells macOS which application to use when opening FTP connections or links. By default, this is set to the Finder, but it can be set to Transmit or any other file transfer app. For example, clicking on |

|
Terminal
|
Choose what Terminal app opens when running By default, this is set to the Terminal app.
|

|
Windows open with
|
Set what will appear in the left and right file browser panes when launching Transmit or opening a new window or tab. The default configuration sets: Left pane: To the Home folder on your computer. right pane: Is set to None, no server selected. |

|
Connect to Servers automatically: If either pane is to a Remote server, checking this box will automatically connect to the server when launching Transmit, opening a new window or tab.
Connect to servers automatically setting can be usurped by macOS State Restoration feature
Tab title shows
Choose to display Server or Folder as the tab title.
ServerSelecting server, will always display the name configured for a server. |

|
FolderSelecting folder, will display and change the name of the parent folder/directory you’re currently in. |

|
File Editor Font
|
Choose the typeface used when editing files in Transmit’s built-in text editor. |

|
Only the file editor font can be customized at this time.
The font used in Transmits UI and file browsers can not be changed.
Privacy
Automatically download S3 region updates: Check to automatically update and install S3 regions
Keep unchecked and update manually from Transmit’s menu bar > Transmit > Check for S3 Region Updates.
Send crash reports: Check to automatically send crash reports after Transmit experiences a problem.
Crash reports are anonymously sent to Sentry, the service we use to collect analytics like crash reports.
Send anonymous usage statistics: Check to automatically send anonymous usage data.
We have a clear, simple explanation of exactly what is sent—and why—on our website.
Check for important announcements: It’s very rare that we send messages in app, check the box if you’d like to receive that sort of surprise, though should you want to keep up with Panic but want to avoid any future messages in app:
Follow Panic on the socials, or Sign up and manage your Panic Mailing Lists
Software Updates
Choose how Transmit handles updates.
Automatically download and install: Transmit automatically checks for and downloads updates in the background.
You’ll only be prompted to relaunch when an update is ready to be installed.
Just notify if there are updates: You’ll be prompted only when an update is available, with the option to download and install the update, be reminded later, or skip this update.
Don’t check for updates: Transmit will not check for updates, and you will not receive any notifications when new versions are released. (Not recommended!)
Update Manually: To manually install newly released updates with enhancements, bug fixes, and important security patches.
Check for updates manually from Transmit’s menu bar > Check for Updates…
Download and install the latest version of Transmit: Transmit 5
Panic Sync
|
A free and secure, purpose-built way to sync your servers, keys, and passwords. |

|
Files
Ask before deleting items
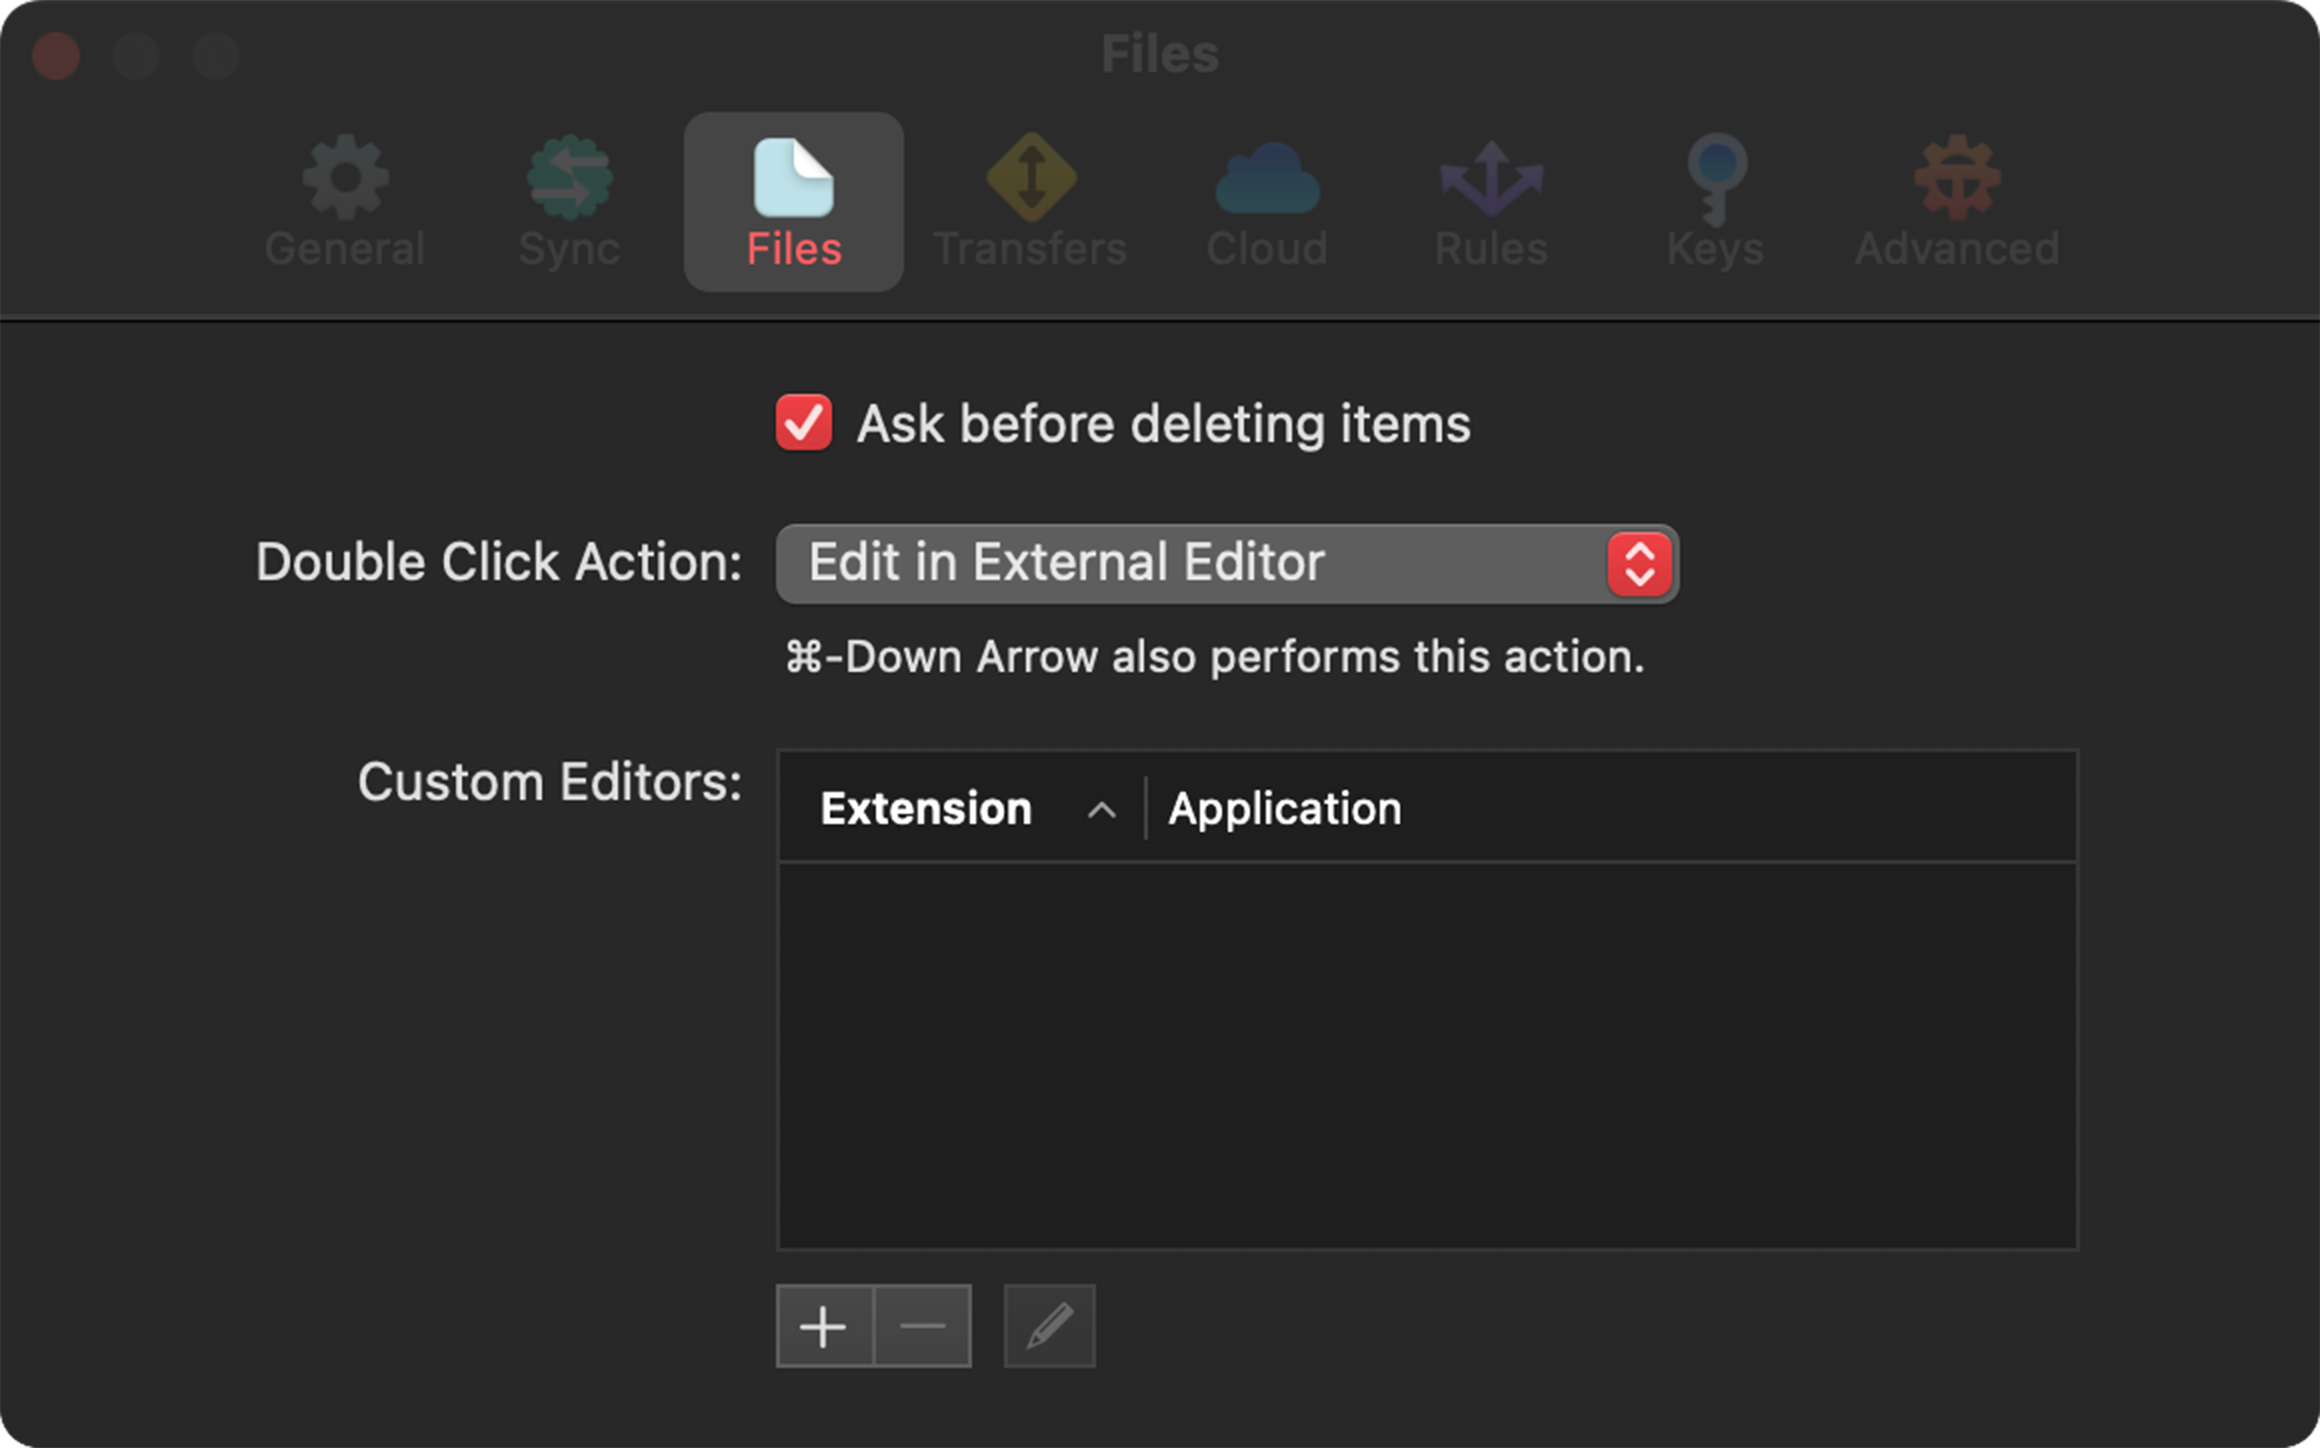
On by default, always be prompted to confirm deletion of selected files and folders.
Unchecking will prevent any notifications or confirmations when files or folders are deleted.
Which means:
Local items will be moved to the Trash.
Remote items will be deleted immediately.
For most servers, this means that the items will be deleted forever.
Unless configured, there is usually not a “Trash” item to go to first.
Contact your hosting provider or IT to learn if that’s an option for your server
Double Click Action
Select what happens when double-clicking a file.
|
Do Nothing: Nothing will happen. Enjoy the silence… 🌬️ Transfer: A transfer will begin immediately, uploading or downloading the file depending on its location. Edit: Open the double-clicked file in Transmit’s built-in text editor. Edit in External Editor: Open the double-clicked file in the default app according to its file type. |

|
Keyboard shortcut: ⌘ + ↓
You can hit Command + Down-Arrow to perform a double-click action on the selected item.
(This works in the Finder, too!)
Custom Editors
|
Choose your preferred application to open specific file types. Click on the to add a extension |

|
Set a file extension to associate an external applications with a particular file type.
|
Use application for all files When checked, the seleted application will be used to open all files. |

|
Custom editors appear in the contextual menu when right-clicking on a file, and will be used when the Double Click Action is set to Edit in External Editor.
Transfers
When An Item Already Exists…
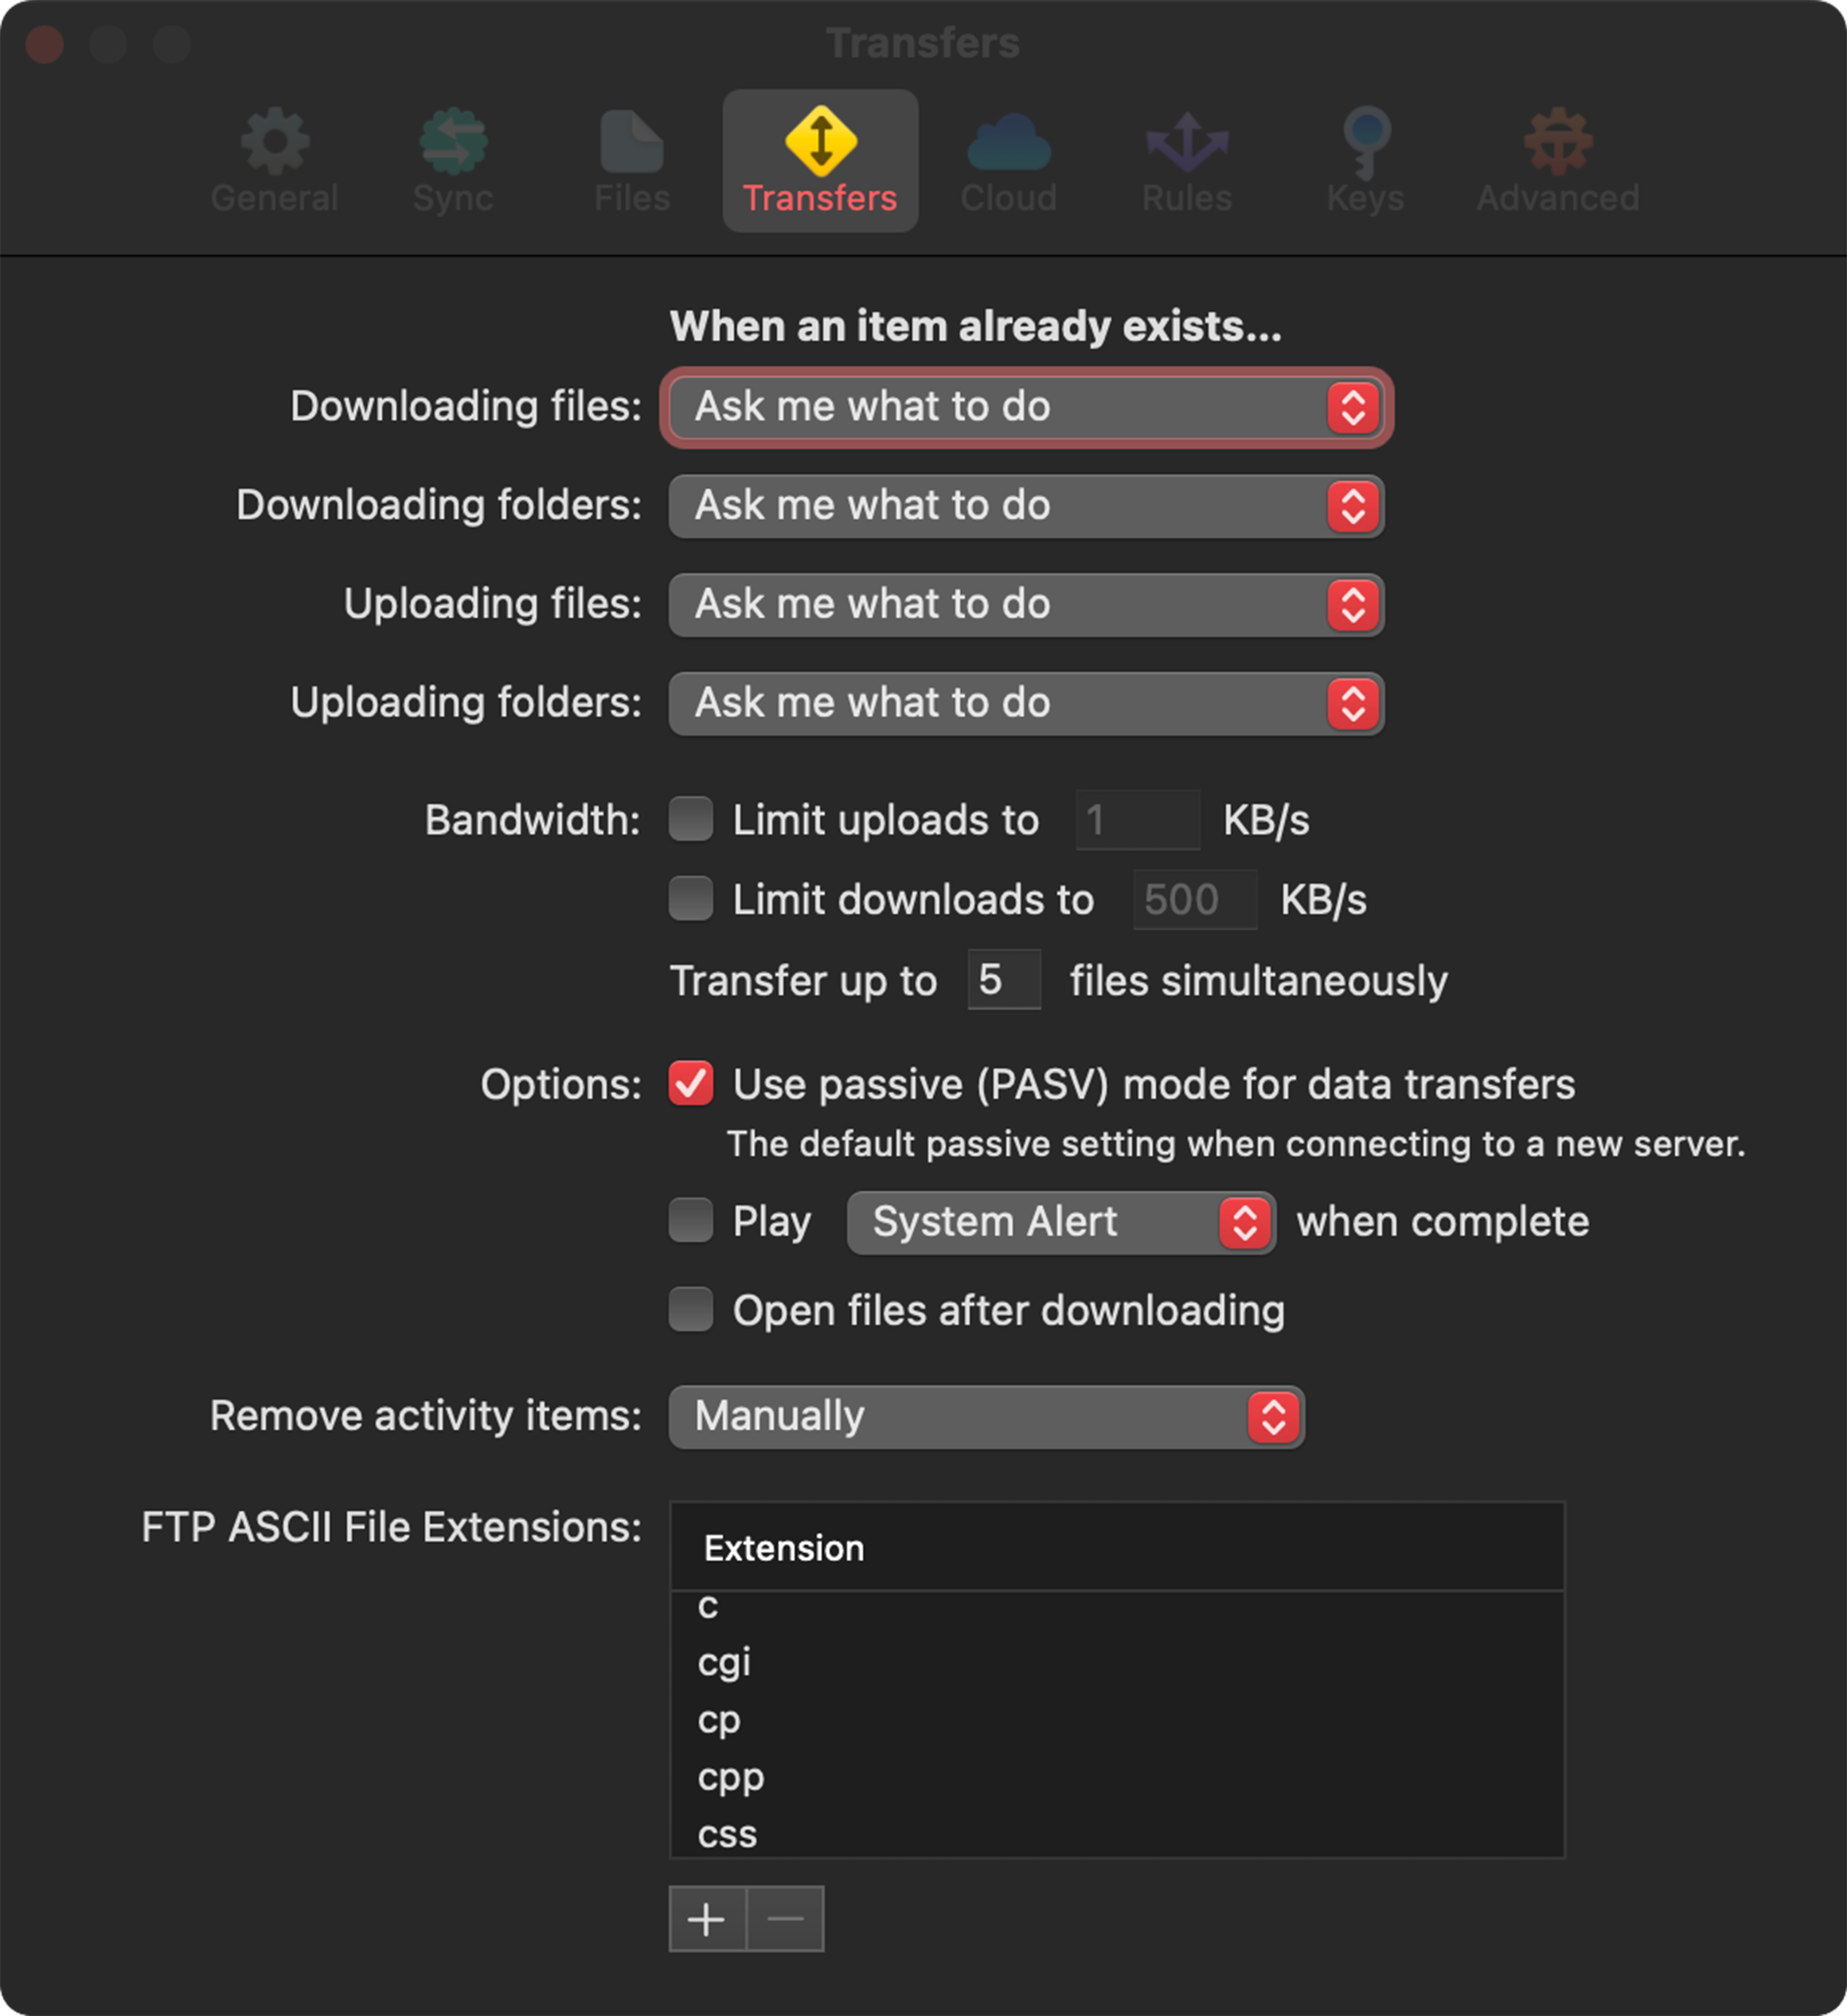
By default, Transmit will ask what to do when a transfer conflict arises, like an item with the same name already existing.
Change the default Ask me what to do settings to tell Transmit what to do instead when a transfer conflict arises, instead of choosing manually each time.
Options for Downloading and Uploading Files
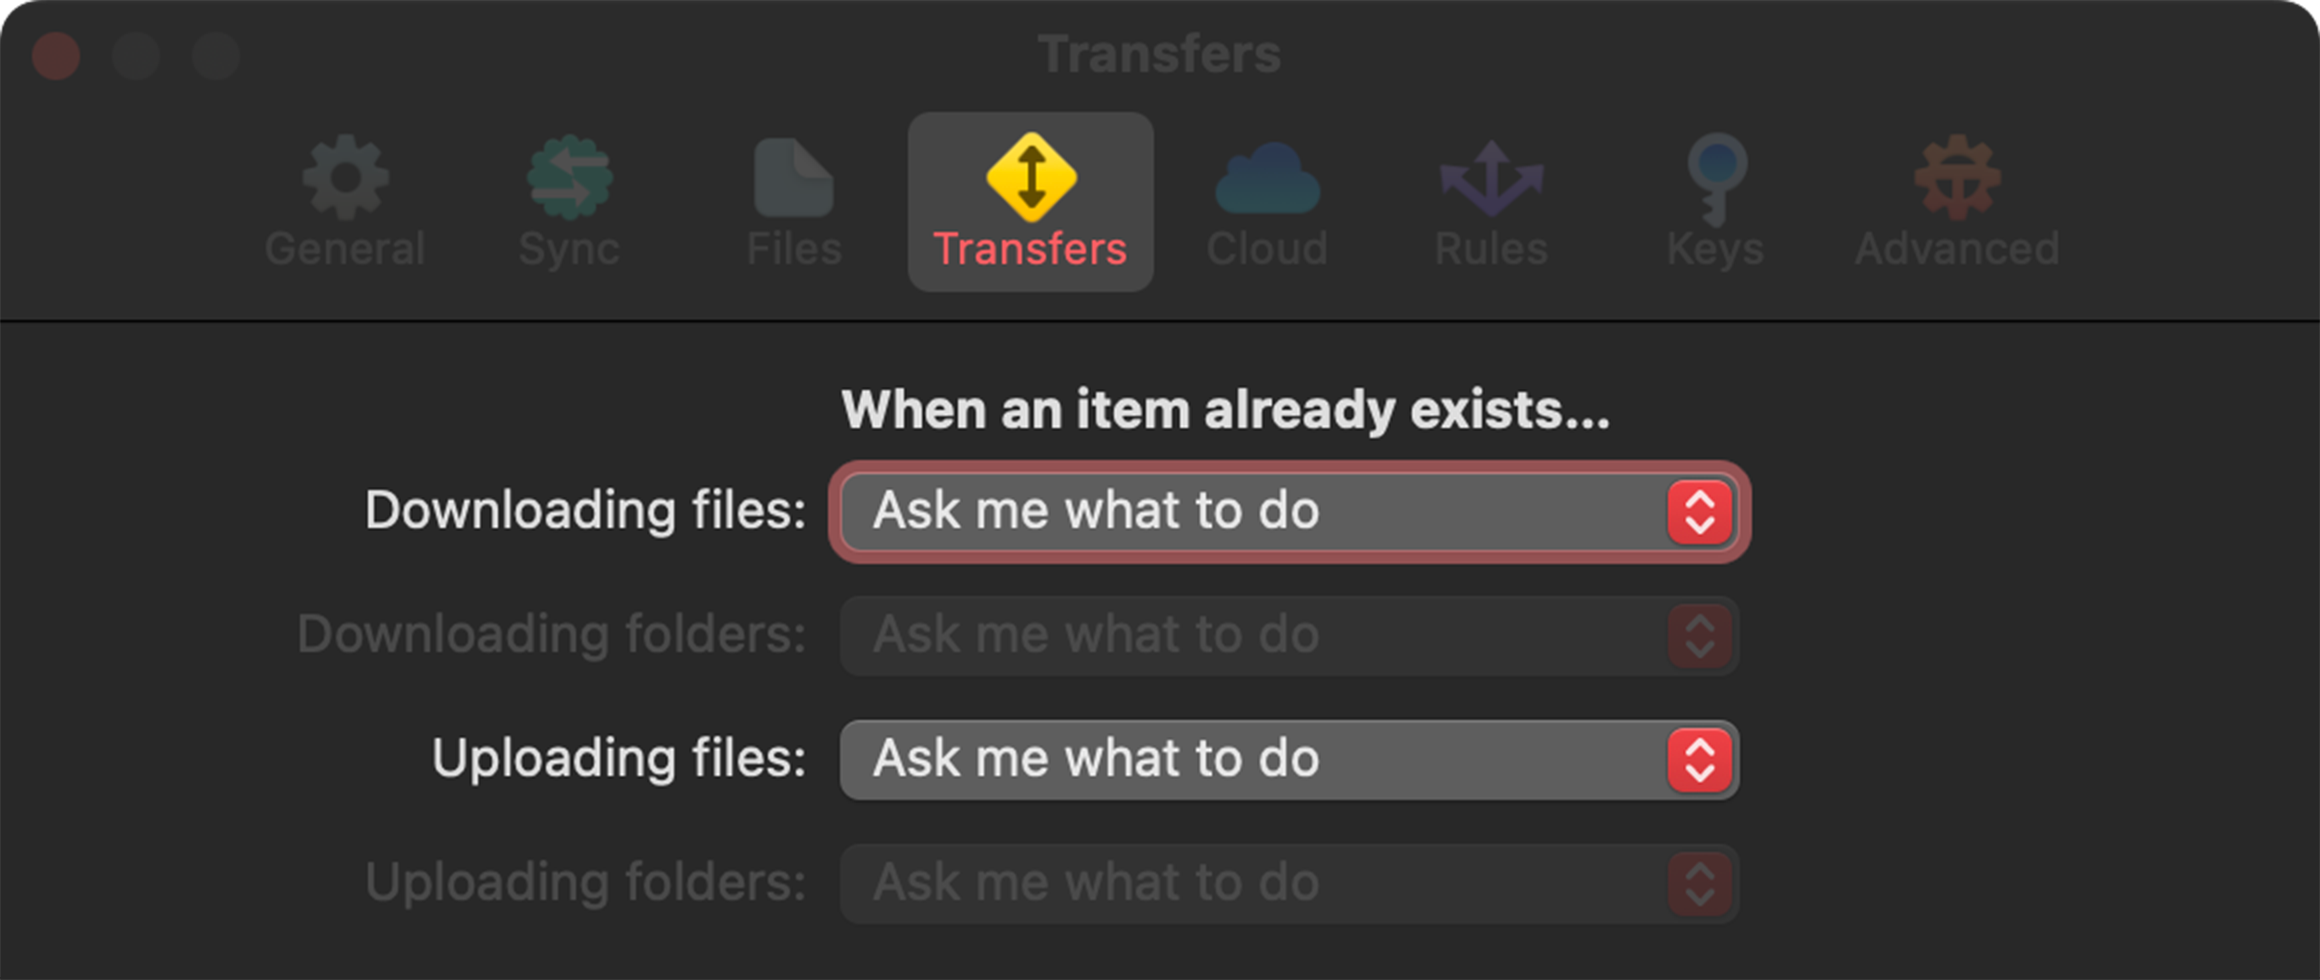
Ask me what to do: The default action, Transmit will always prompt on how to handle the conflict each time.
|
Replace the existing file: Delete the file in the destination folder and replace it with the file being transferred. Try to resume the transfer: After resolving a problem with a transfer, this option will attempt to finish a partially transferred file.
Keep both files: When a file with the same name exists, both files are kept and no files are deleted. The file being transferred will have a Skip the file: No transfer takes place, and the existing file in the destination remains unchanged. |

|
Options for Downloading and Uploading Folders
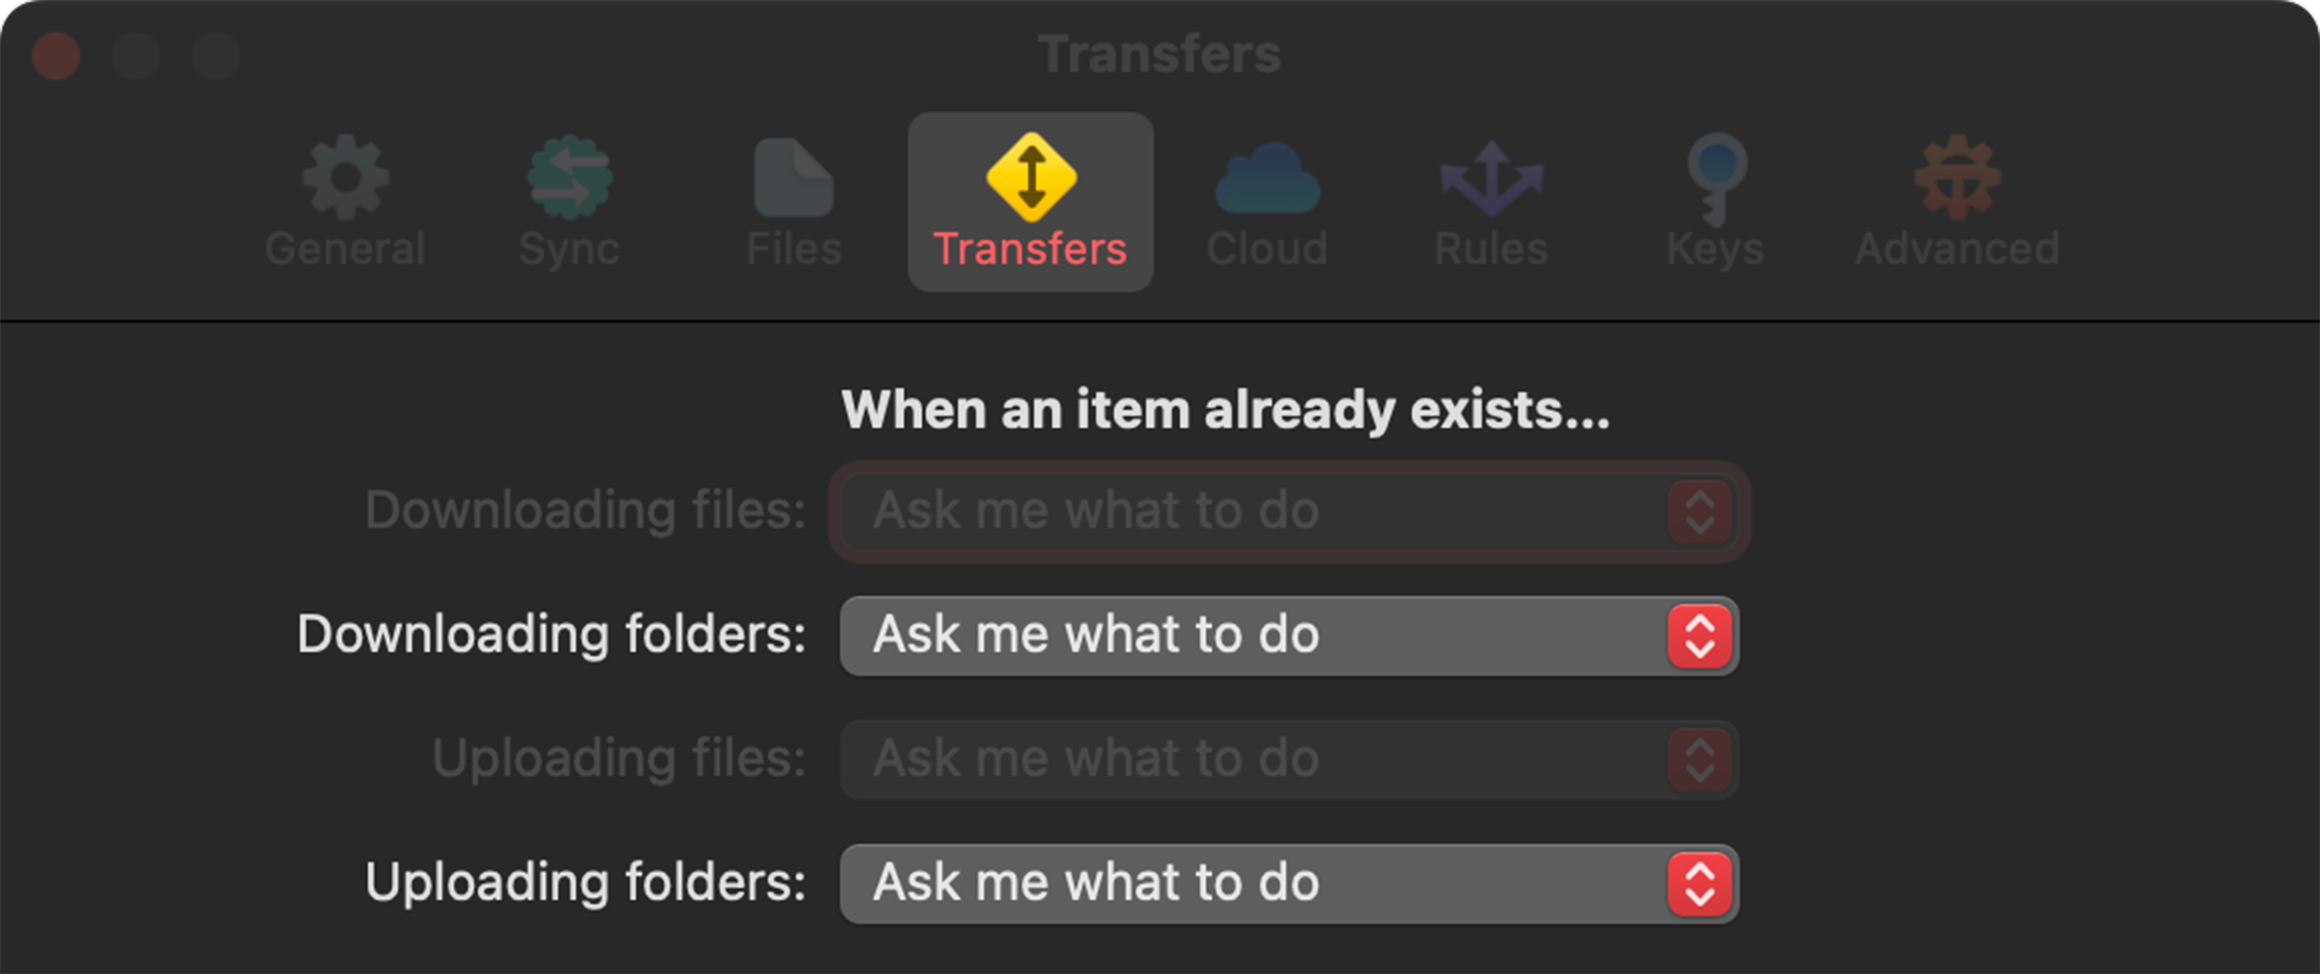
Ask me what to do: The default action, Transmit will always prompt on how to handle the conflict each time.
|
Replace the existing folder: Delete the folder in the destination and replace it with the folder being transferred. Merge the existing folder: The folder being transferred and the destination folder will be compared, and:
Keep both folders: Bothfolder are kept, and no folder are deleted. The folder being transferred will have a Skip the folder: No transfer takes place, and the existing `folder in the destination remains unchanged. |

|
Bandwidth
Option to limit the total bandwidth used when uploading and downloading items in Transmit.
By default, there is no limit set for the bandwidth Transmit is allowed to use during a transfer.
|
Limit uploads to
Limit downloads to |

|
If you have a relatively fast network connection (above 1 MB/sec), these setting can be unreliable, and should be avoided.
Transfer up to __ files simultaneously
This sets the number of files that are actively transferring at any given time.
Transmit defaults to 5 items at a time: the max files supported is 20.
This setting does not apply to most cloud services. Learn more about rate-limiting in cloud services.
A note on a large number of transfers
While Transmit is designed to be able to transfer up to 20 files at once, not all servers support that many simultaneous file transfers. We recommend keeping the number low or checking with your hosting provider or network administrator.
To limit the number of simultaneous connections to your server, go to the Advanced Server Settings.
Use passive (PASV) mode for data transfers
On by default for transfers to use passive mode for FTP transfers.
Uncheck to prevent passive mode from being used.
The vast majority of FTP servers require PASV mode.
We recommend not to uncheck this button unless you’re sure you’re connecting to servers that do not,
as it may prevent you from connecting to your servers
Note that each of your saved Servers has a setting for this that will override this global setting.
Play System Alert when complete
|
Check and select the sound that will play (if any) when Transmit needs to get your attention. |

|
Open files after downloading
Check to automatically open files once they finish downloading.
Any custom file settings set in Transmit will be ignored. Files will open based on file type in their default app.
Remove activity Items
|
Choose how transferred items in the Server Activity window are kept. Upon successful transfer: All items will be automatically removed after being successfully transferred. Manually: No items are removed. |

|
Removing items manuallyThe transfer list can be manually cleared using the |

|
FTP ASCII File Extensions
|
Files listed will be transferred using FTP’s ASCII mode. If an extension for a file is not on this list, it will be transferred in Binary mode. To add an extension and have it always transfer in ASCII mode: To remove an extension and have it always transfer in Binary Mode: |

|
Cloud
Custom Cloud Server Upload Headers
Add custom headers for cloud servers like Amazon S3 or Microsoft Azure.
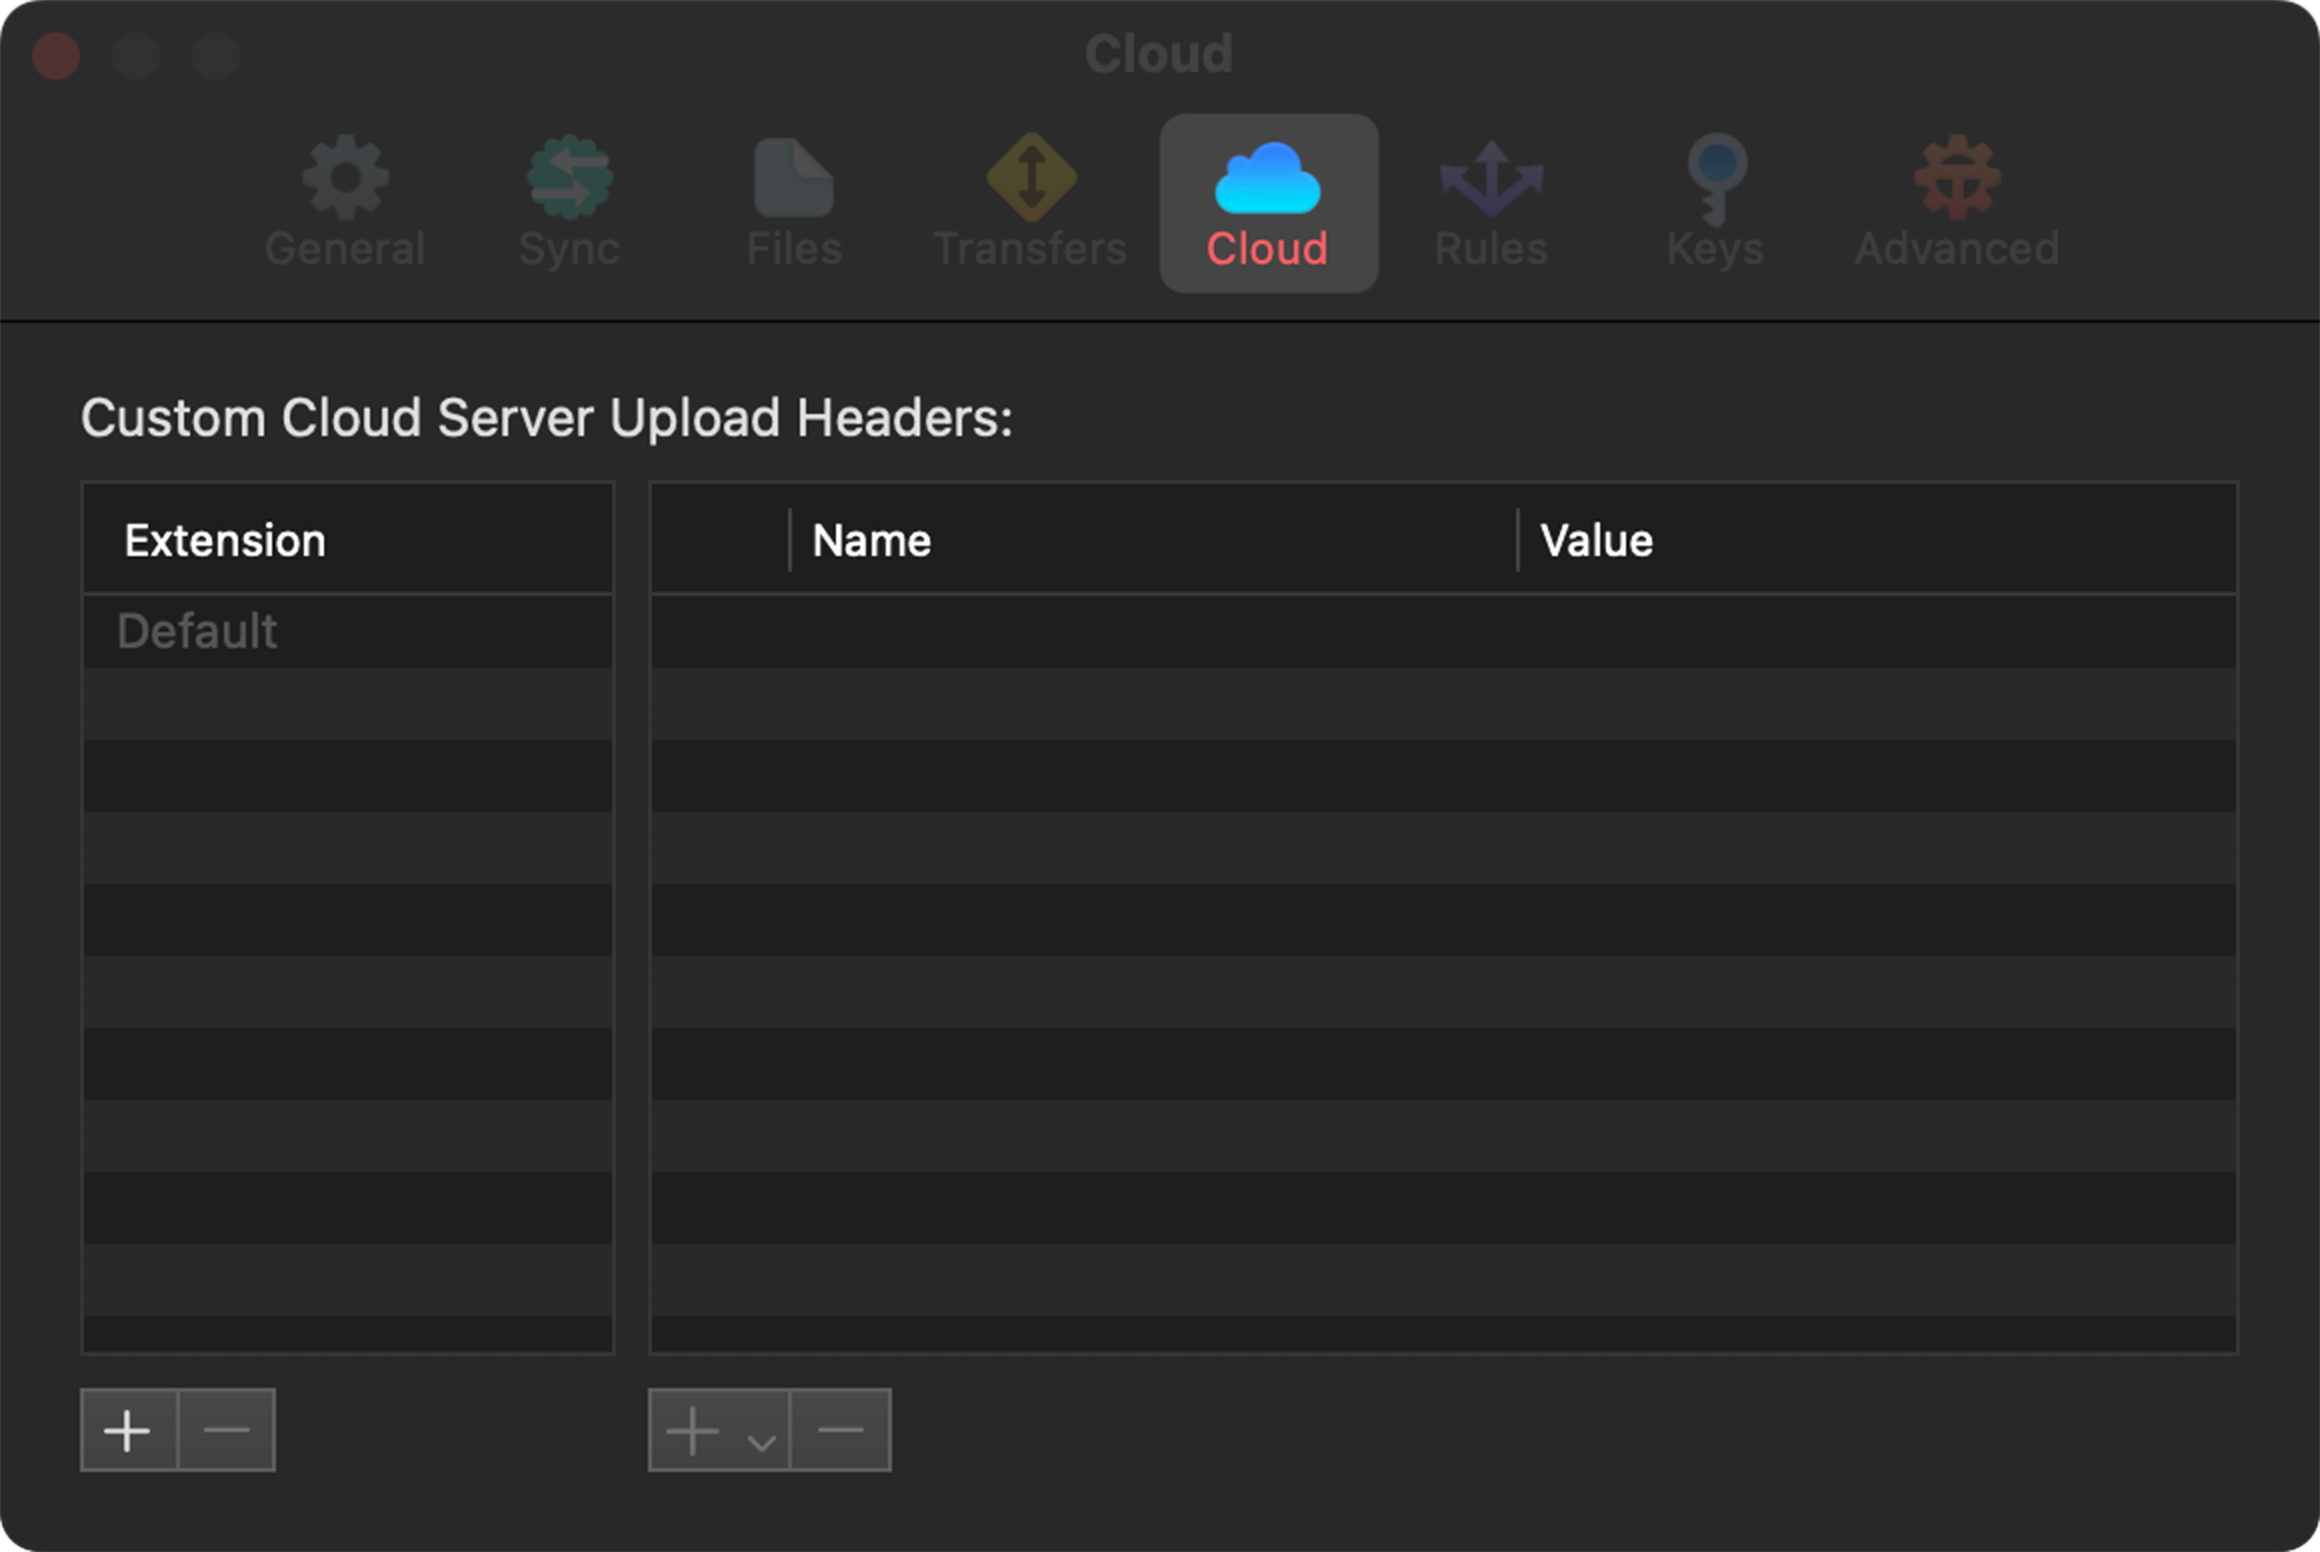
Extension
The file type the custom header will affect.
|
Default: Add a custom header to the default extension to affect ALL extensions. Adding a new Extension: Press the plus button under the extensions column to add a new extension. Remove an Extension: Select an extension and press the button. Press Delete when prompted to confirm. |

|
Adding Custom Headers
|
To add a custom header, an extension must be selected first. After selecting an extension, press the
plus button under the |

|
Choose from the options below:
|
Custom Header |

|
|
Content-Type |

|
|
Content-Disposition |

|
|
Content-Encoding |

|
|
Cache-Control |

|
|
x-amz-storage-class |

|
|
x-amz-acl |

|
Turning Custom Headers On/Off
When checked, the custom headers will be on when a file is uploaded.
Use the checkboxes to quickly enable/disable specific headers without having to delete and recreate them.
Rules
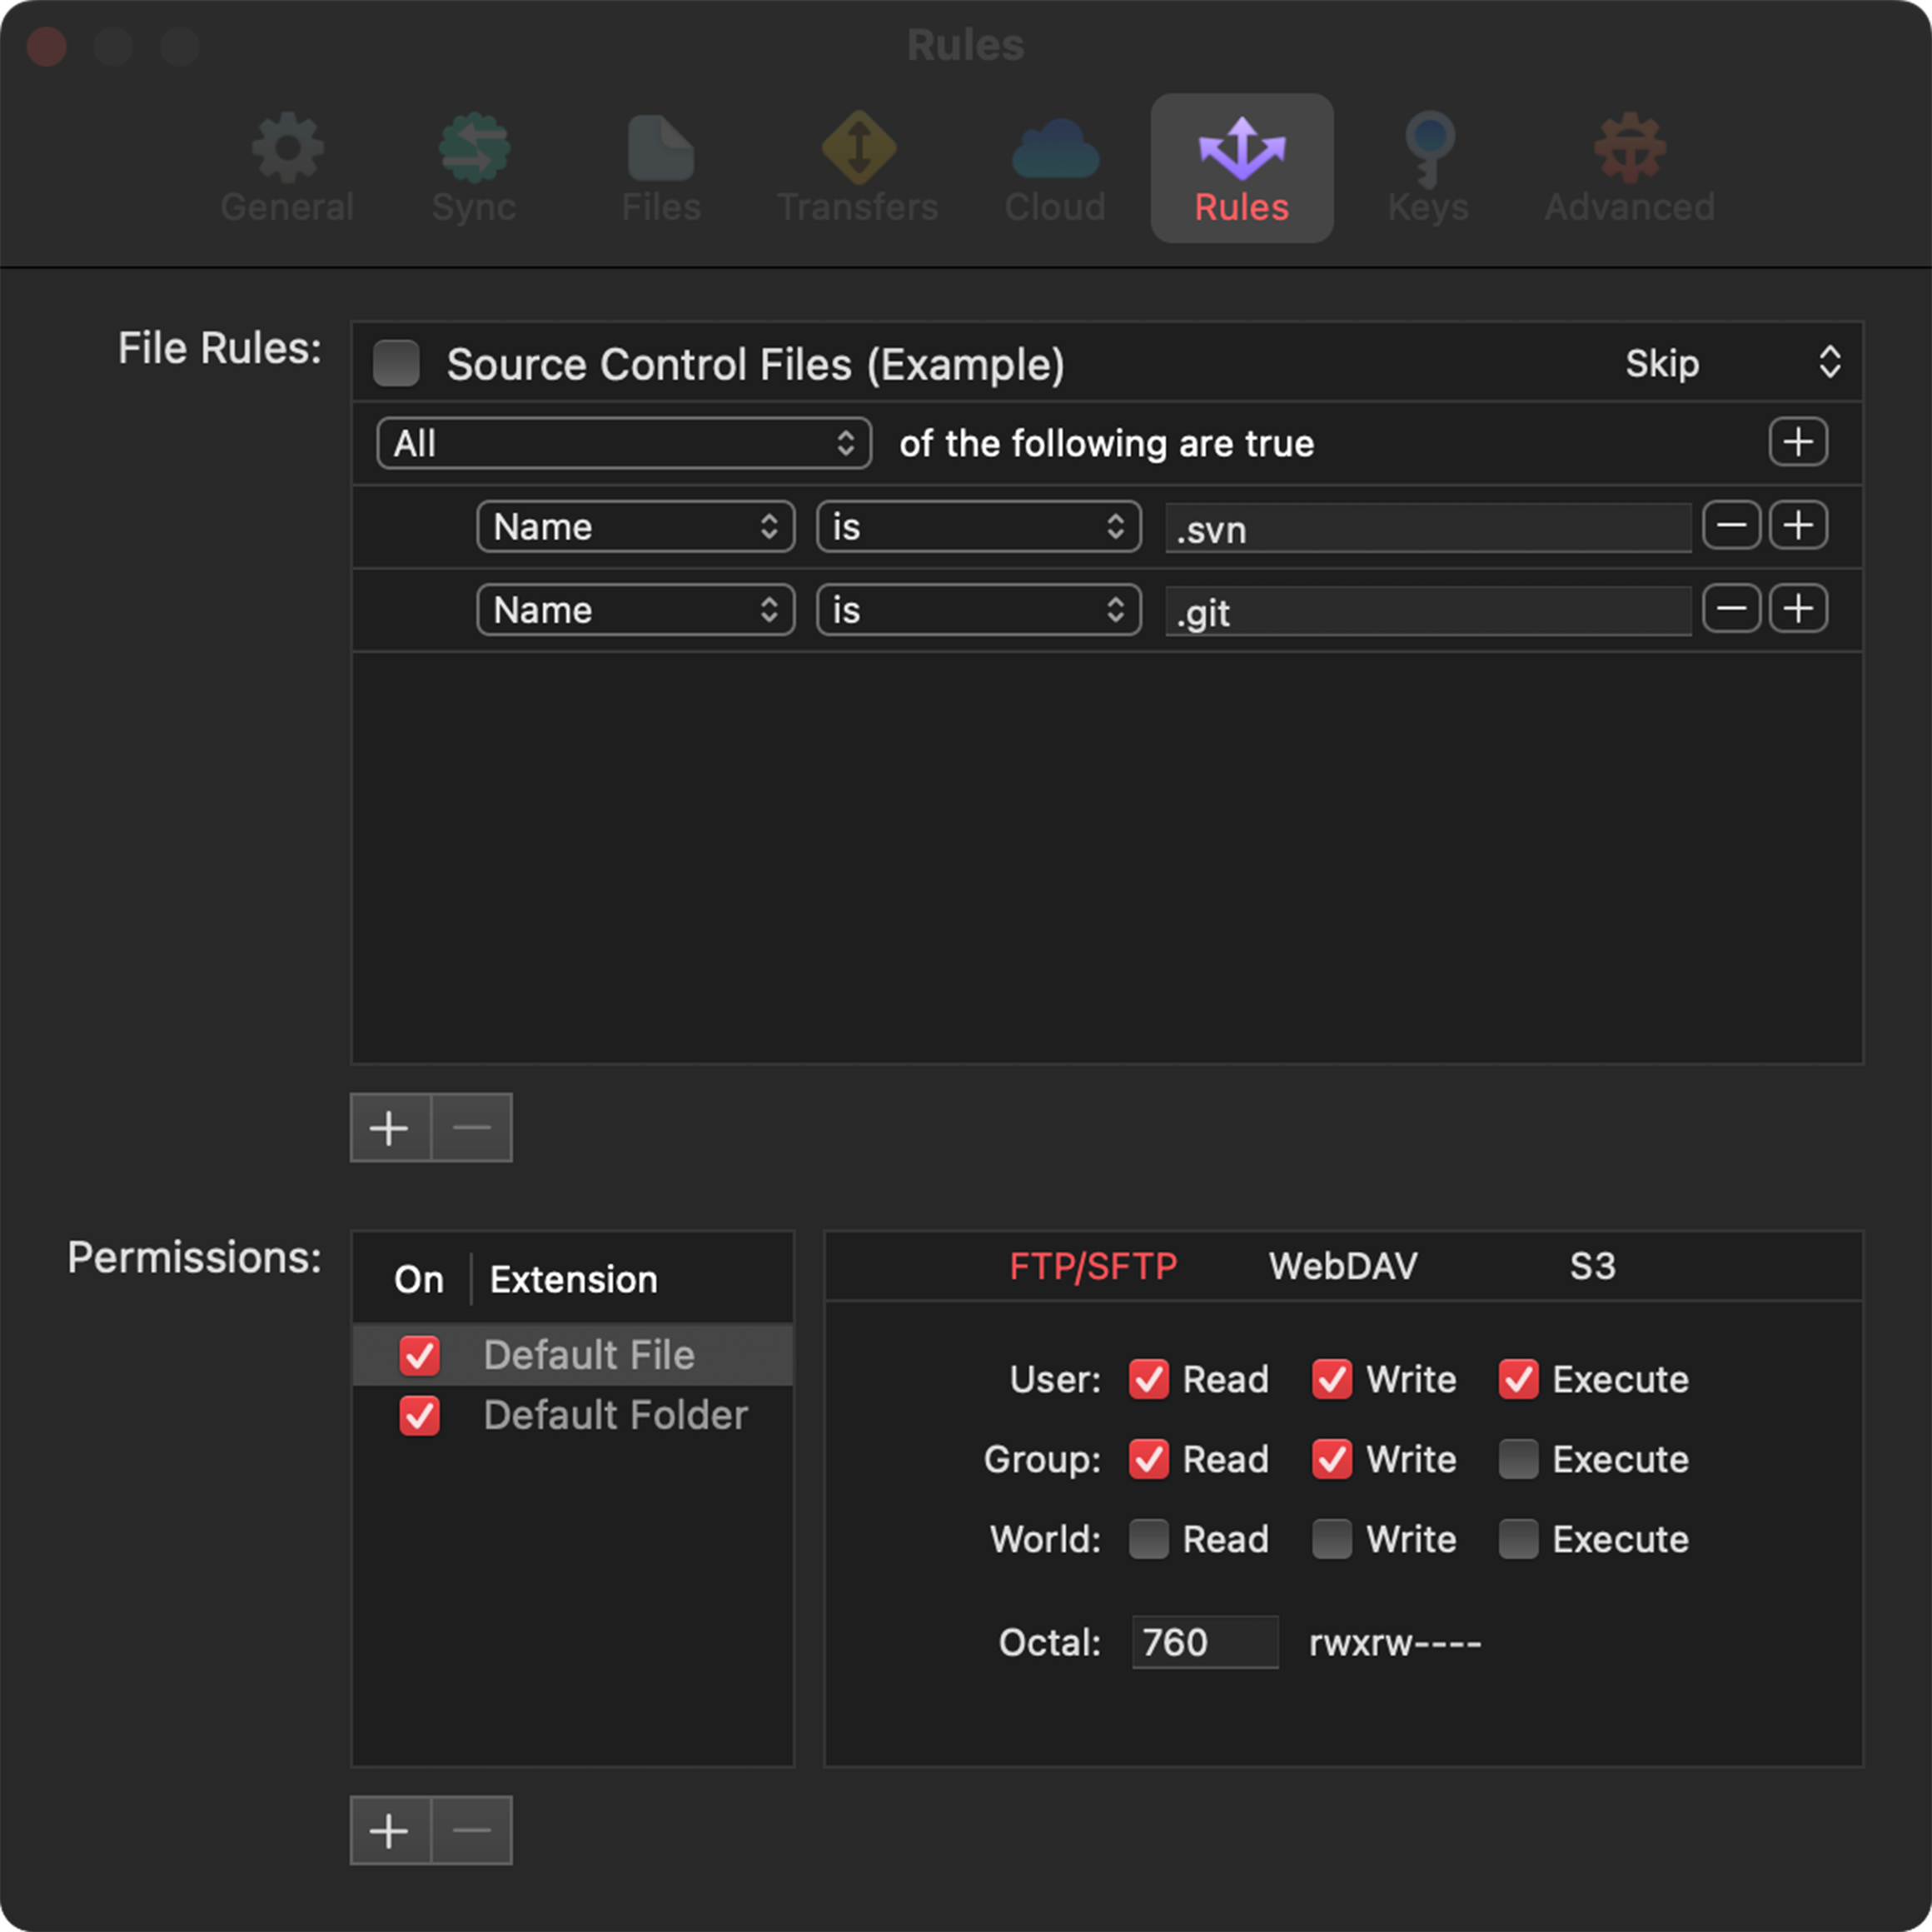
File Rules
Create rules to control how files and folders are transferred.
|
Adding a New Rule Click the plus button on the bottom left to add a new rule. |

|
Learn more about Rules
Dive deeper into rules: Dig into the anatomy of all the rules as we break each section down.
Permissions
By default, when transferring any item in Transmit, the server determines what the permissions will be.
As long as your server supports it, Transmit can be configured to explicitly set permissions for files and folders on FTP/SFTP, WebDAV, and S3 servers.
|
Turning on default file or folder, will allow you to set permissions for ALL files on FTP/SFTP, WebDAV or S3 servers. |

|
Custom Permissions
FTP/SFTP |

|
WebDAV |

|
S3 |

|
Custom Extension
|
Click the bottom-left plus icon to add an extension and set what the permissions will be for that specific file type. |

|
Keys
Transmit supports SSH keys for SFTP connections.
Keys in this list can be used to connect to your servers, and if Panic Sync is enabled, they will be synced to your other devices.
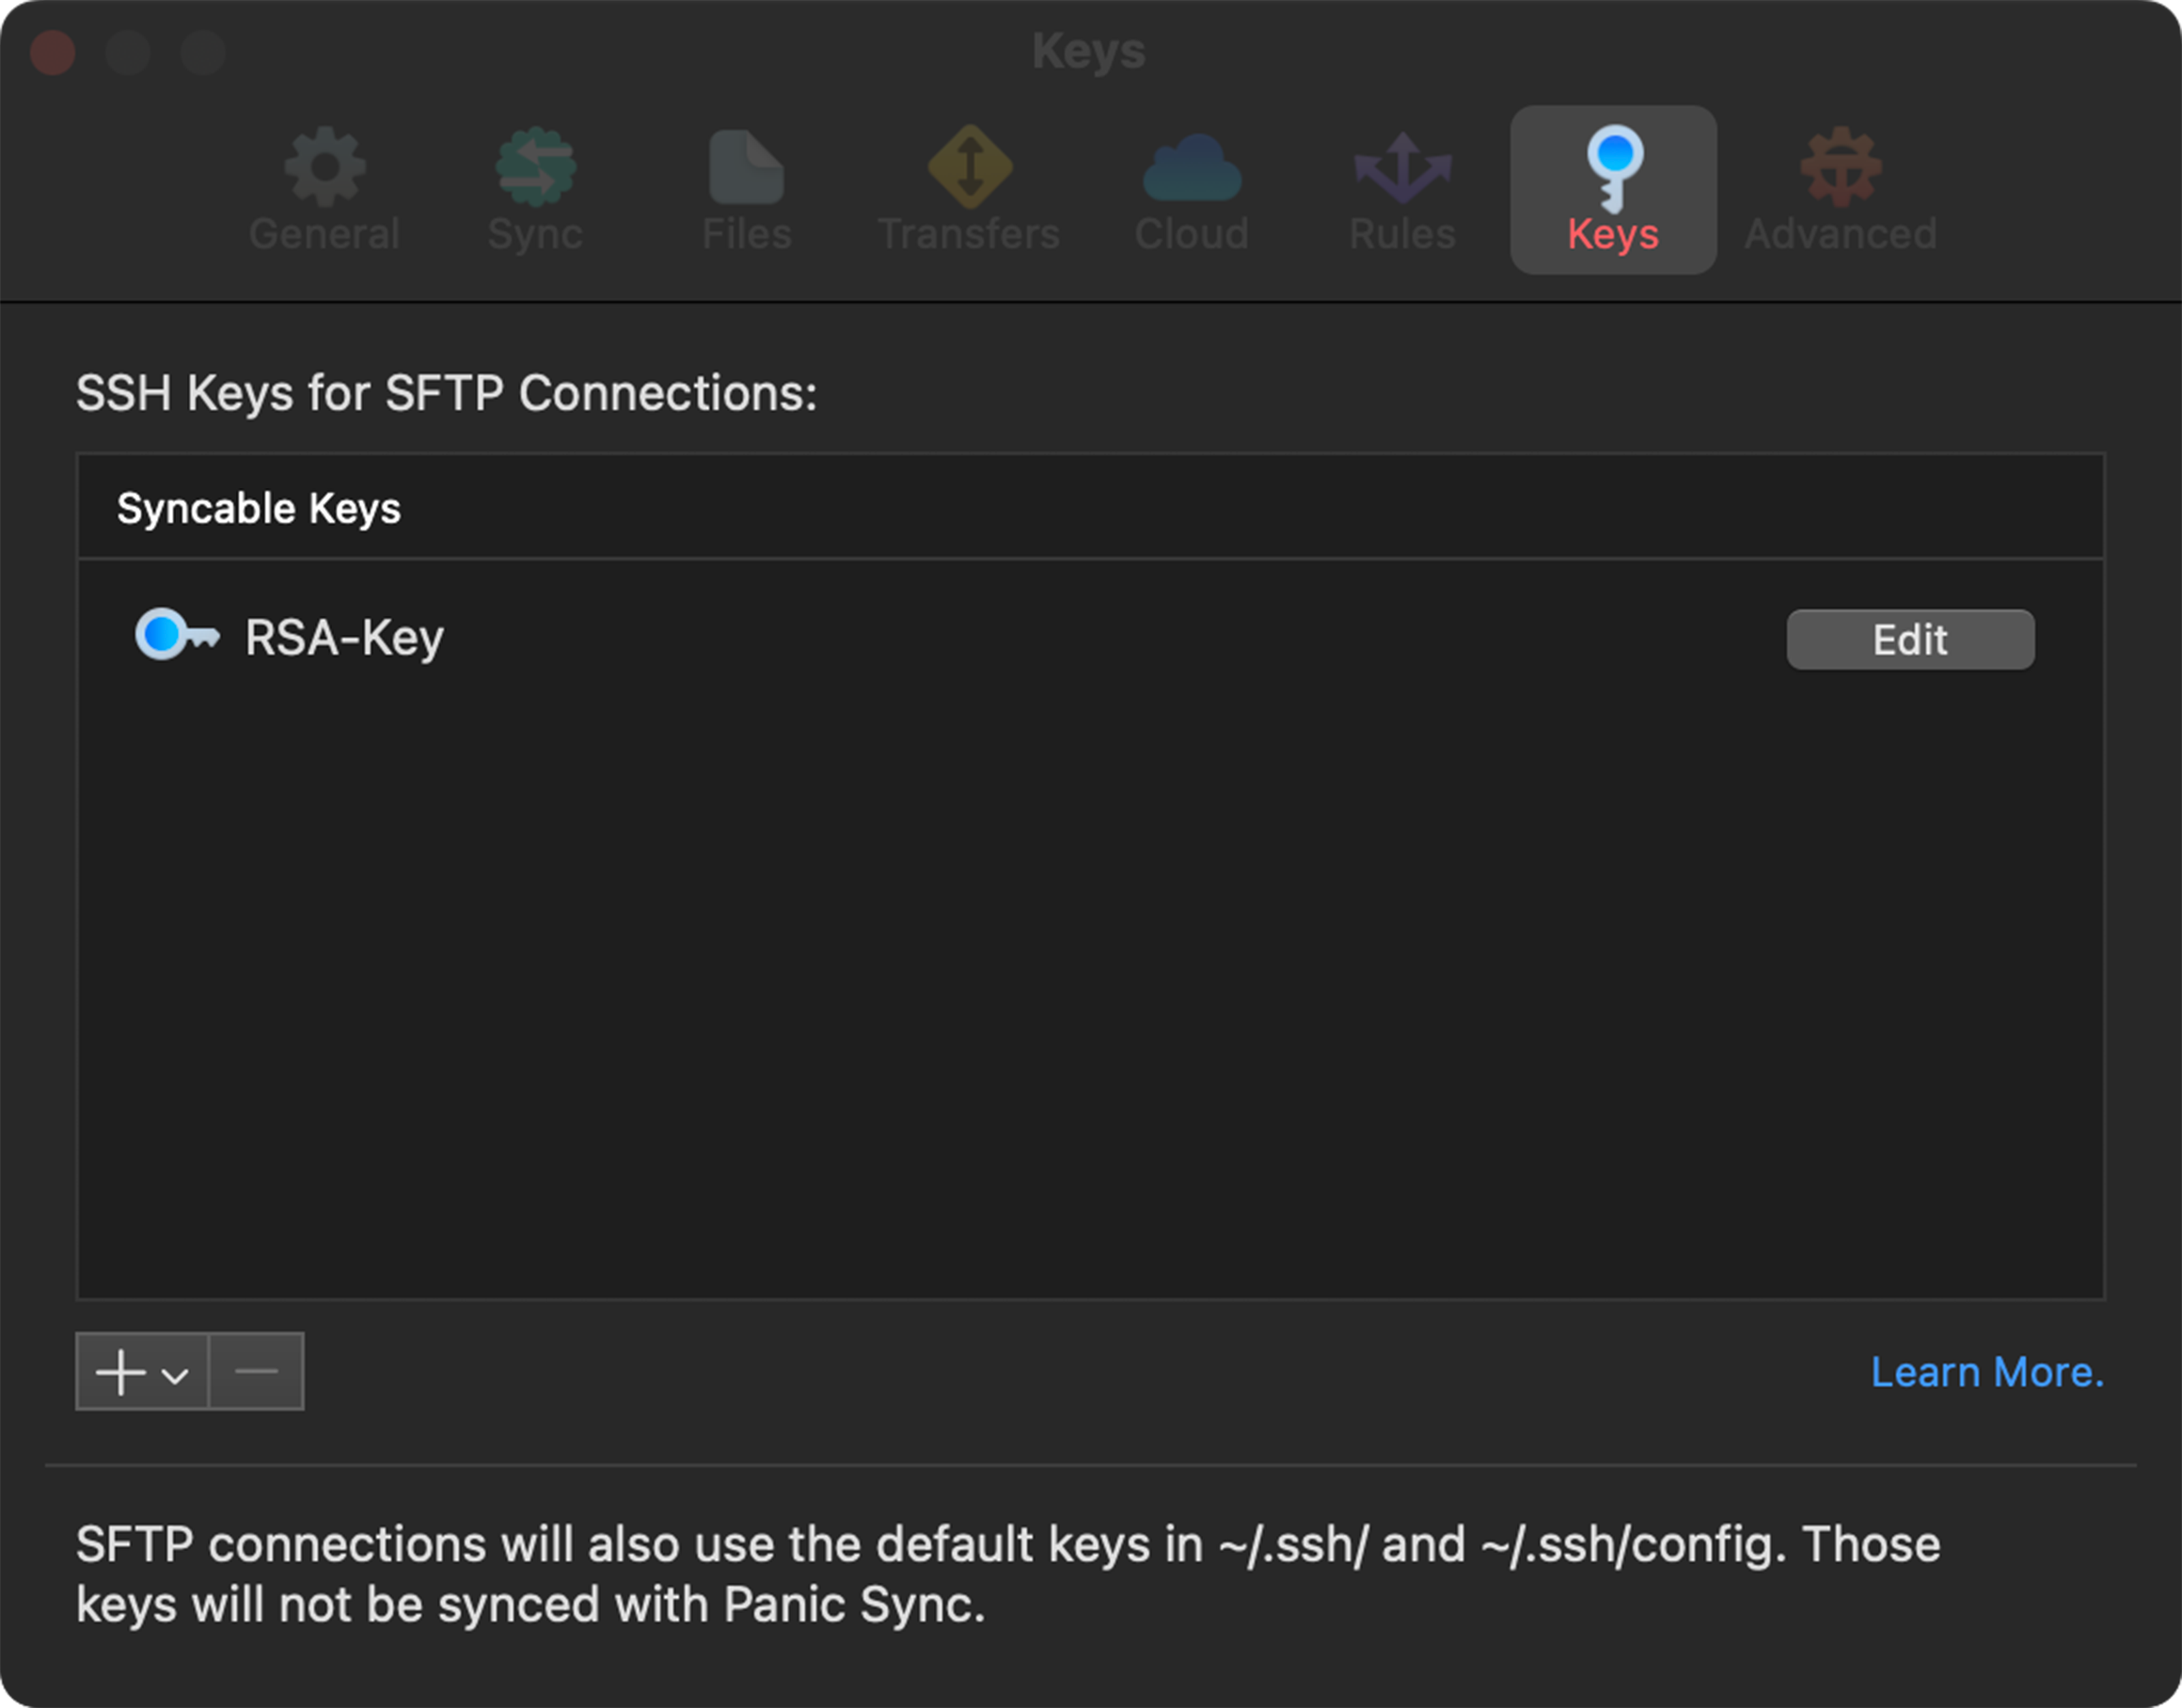
Keys stored in your ~/.ssh folder will be used automatically if you leave the password field blank for the favorite.
SFTP connections will also use default keys in ~/.ssh/ and ~/.ssh/config. These keys will not be synced with Panic Sync.
Generate a New Key

|
To generate a new key, click the and choose Generate Key. |
Configure New Key:
|
The following are the key formats that can be generated in Transmit and the supported features.
RSA
ECDSA
Ed25519
ECDSA-SK
Ed25519-SK |

|
Saving a Generated Key
|
After generating a key, you’ll be prompted to copy both the Public and Private keys. It is okay if this prompt is closed, we can copy these at any time after as well. The copied Public and Private key will go to your Clipboard, ready to be pasted into a server config windows or saved in a text file. |

|
Editing a Key
|
Once you’ve generated a key, it will show up in your Syncable Keys list. Click the Edit button of any key to view and edit details about a key:
|

|
Copying Generated Keys
The two overlapping square icons on the bottom-left provide the ability to copy either the Public Key or Private Key keys
automatically to your Clipboard.
Import Existing Key

|
To import a key into Transmit, click the , choose Import Keys, and select the key files to import from the Finder window that appears. |
Supported Keys to Import
ECDS, RSA keys in PEM format.
RSA, Ed25519, and ECDSA keys in OpenSSH format.
ECDSA-SK and Ed25519-SK FIDO2 keys—you only need to import the private key reference file.
Advanced
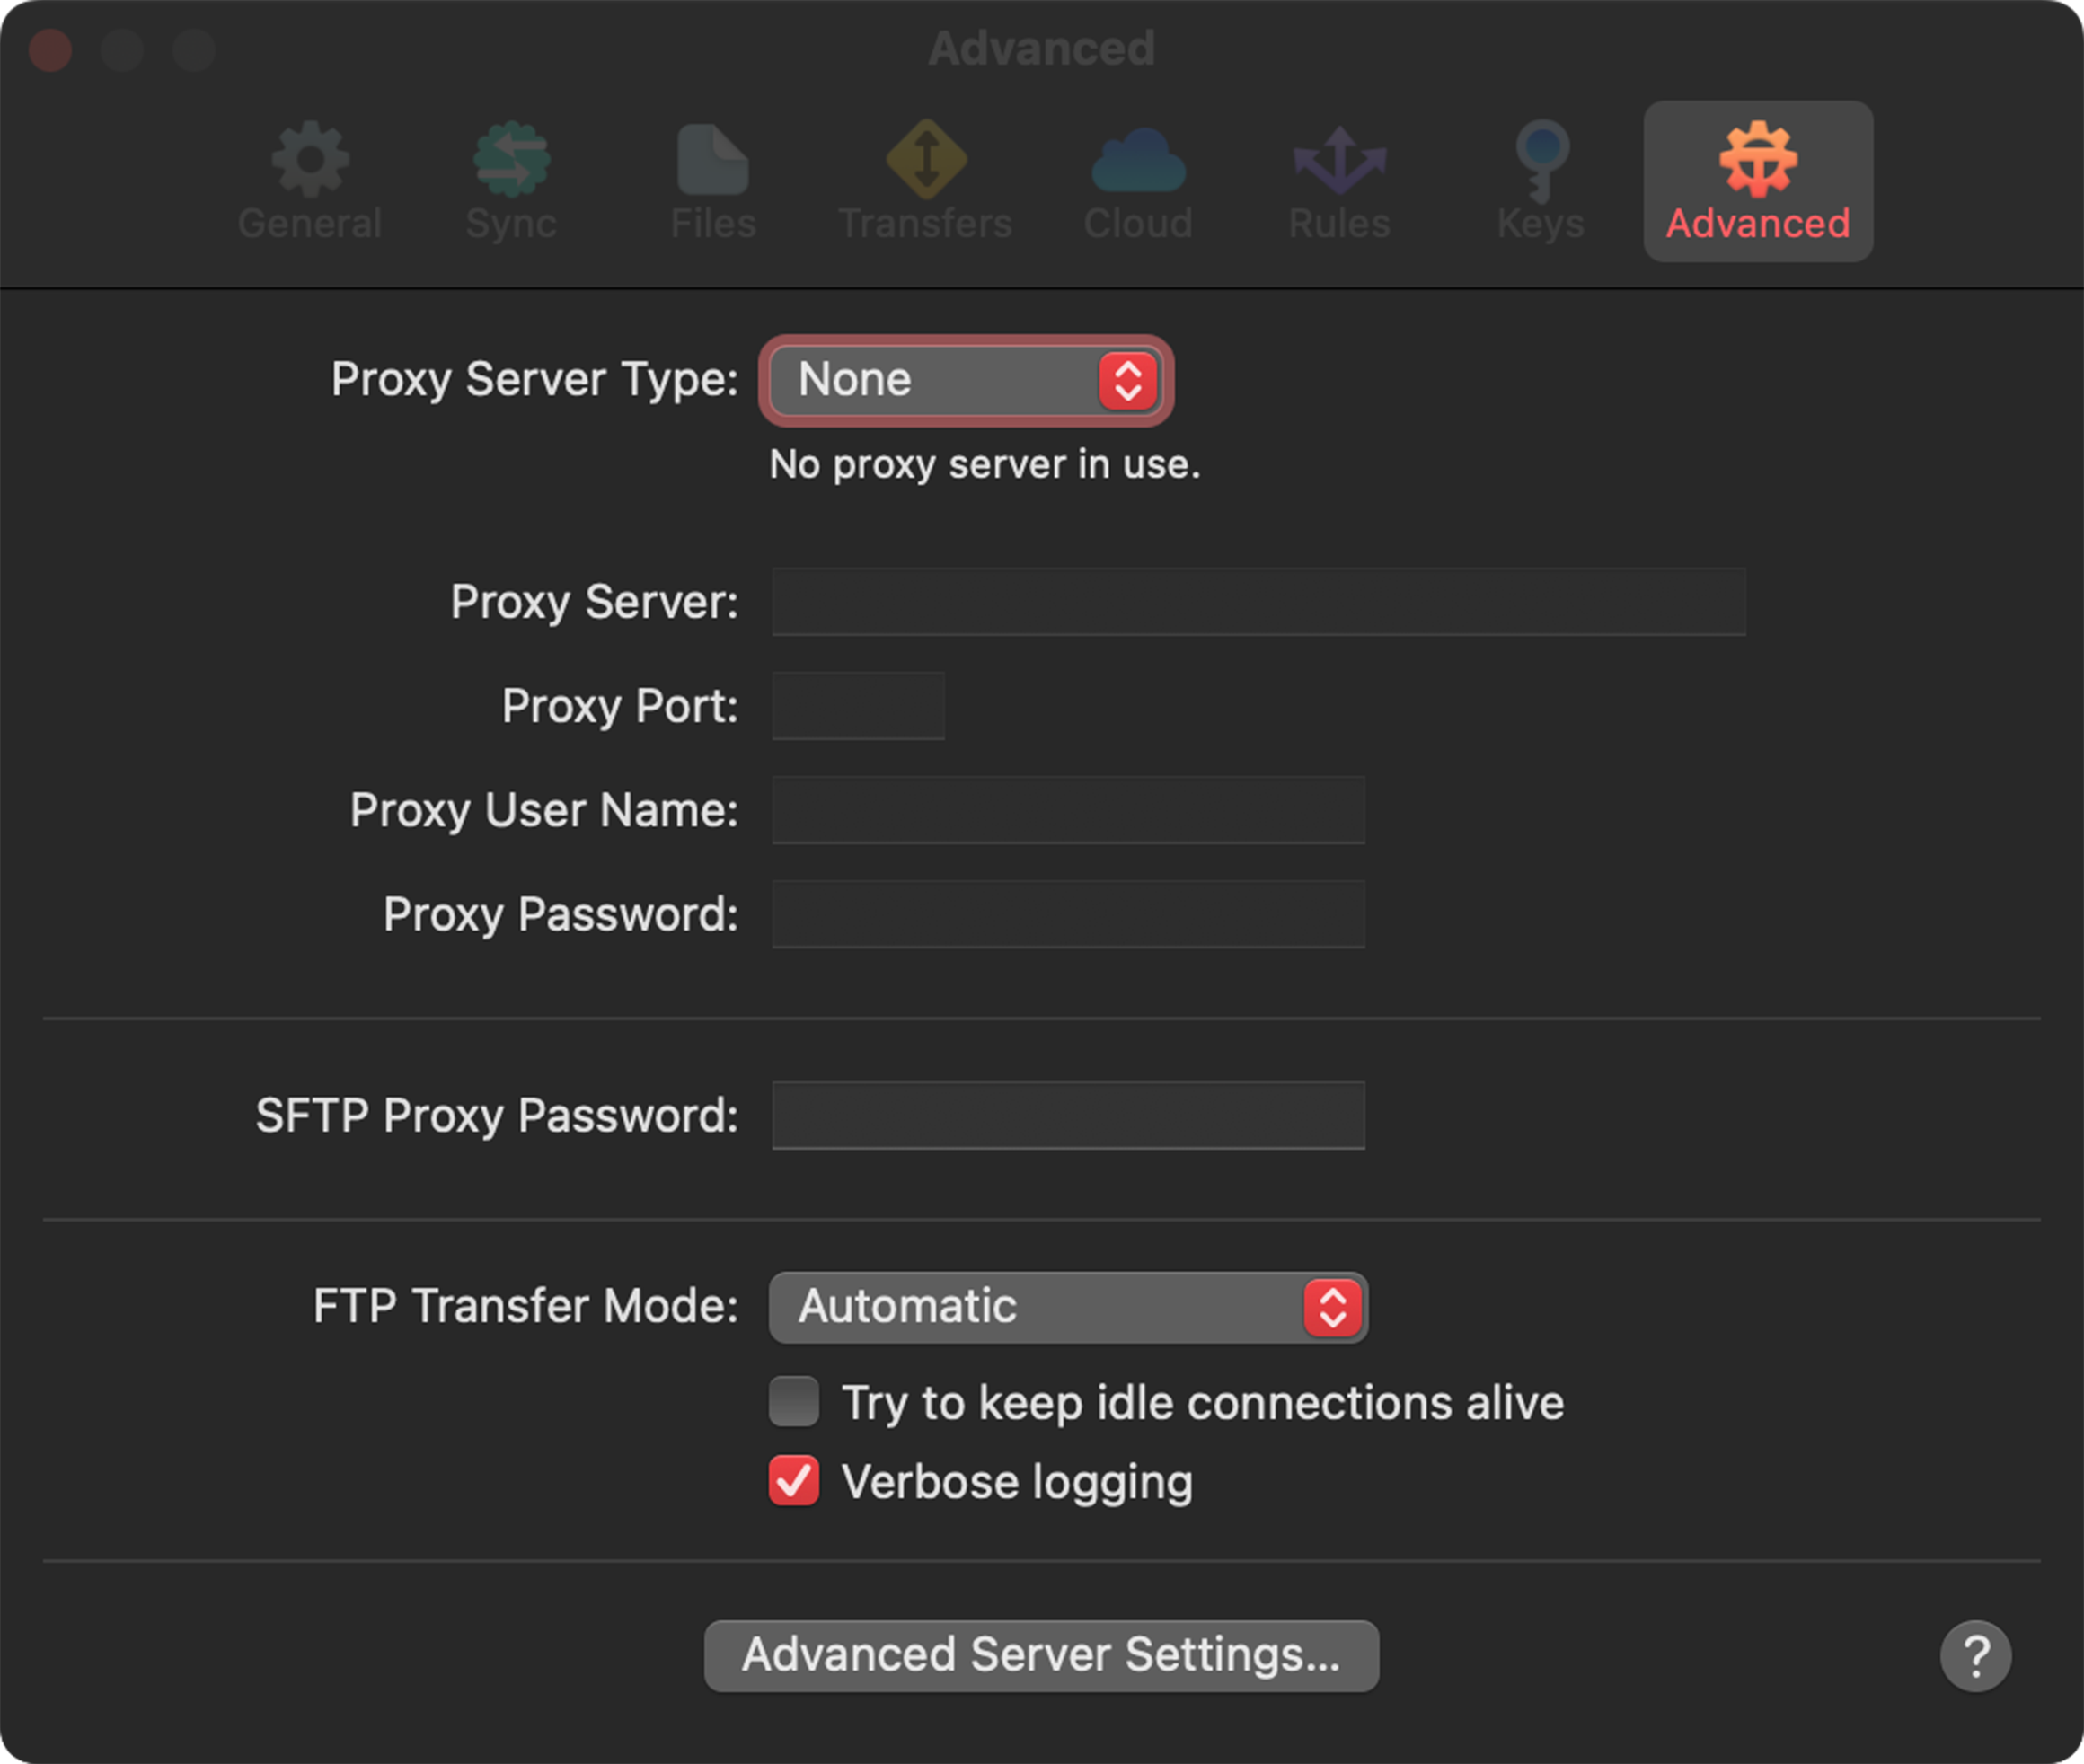
Proxy Server Support
Configure FTP proxy connections by choosing the proxy type and entering the connection details.
Otherwise, we recommend setting to None and leaving settings untouched.
Supported Proxy server connection details
Proxy Server: The address for the proxy server.
Proxy Port: Port required for the connection.
Proxy User Name: Username required for the connection.
Proxy Password: Password required for the connection.
Proxy Server Type
Select a server type from the list of the available proxy servers. connections details they support and how they connect will be displayed
None
No proxy server in use.
Type 1
Send “USER user@real.hostname”.
Type 2
Login to firewall with “USER fwuser” and “PASS fwpass”, then “USER user@real.hostname”.
Type 3
Use “SITE real.hostname”, followed by the regular USER and PASS.
Type 4
Use “OPEN real.hostname”, followed by the regular USER and PASS.
Type 5
Send “USER user@fwuser@real.hostname” and “PASS pass@fwpass”.
Type 6
Send “USER fwuser@real.hostname” and “PASS fwpass”, followed by “USER user” and “PASS pass”.
Type 7
Send “USER user@real.hostname fwuser” and “PASS pass”, followed by “ACCT fwpass”.
Type 8
Send “USER user@real.hostname:port”, followed by “PASS pass”.
Type 9
Send “USER user@real.hostname port”, followed by “PASS pass”.
Type 10
Send “USER user@fwuser@hostname”.
SOCKS 4
SOCKS 4 proxy server in use.
SOCKS 4a
SOCKS 4a proxy server in use.
SOCKS 5
SOCKS 5 proxy server in use.
SFTP Proxy Password
The password used by Transmit when using a configured SFTP Proxy configured in your config file
FTP Transfer Mode
Explicitly set the transfer mode used for transfers made via FTP or FTP over TLS/SSL.
Automatic: The transfer mode is chosen according to the item’s file extension.
If the extension is found in the list of ASCII File Extensions in Settings: ASCII mode is use, If not, Binary is used.
ASCII (Text): Data is handled as 8-bit ASCII text.
Some servers need to know this to be able to add the correct line endings for locally storing the data as text.
Binary: The raw data is transferred with no conversion of any kind.
Try to Keep Idle Connections Alive
When enabled, Transmit will periodically send a simple command to prevent the connection from being closed.
Verbose logging
When enabled, additional logging is added to a Transcript of a server connection.
With Verbose logging on, if you reach an error or issue with your server or connection, you can open the Window menu, choose Transcript (Window > Transcript), and copy the contents of that window to provide to Panics Support.
Advanced Server Settings
Click the Advanced Server Settings button to view additional settings